A new thing-a-majig and a new painting

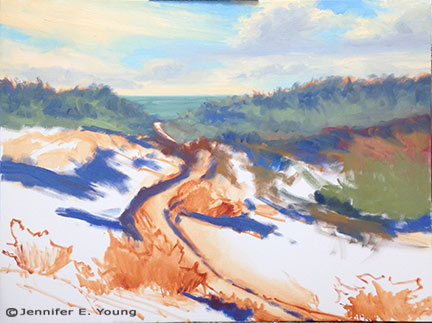
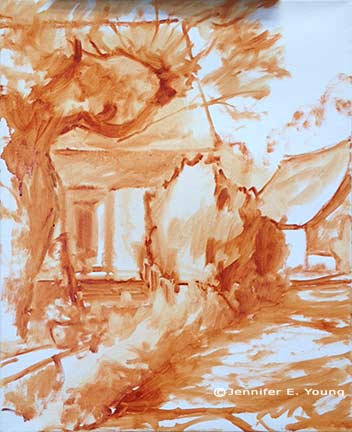
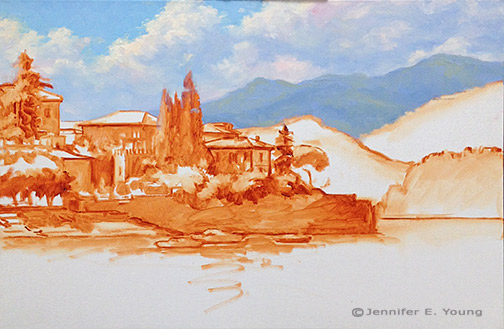
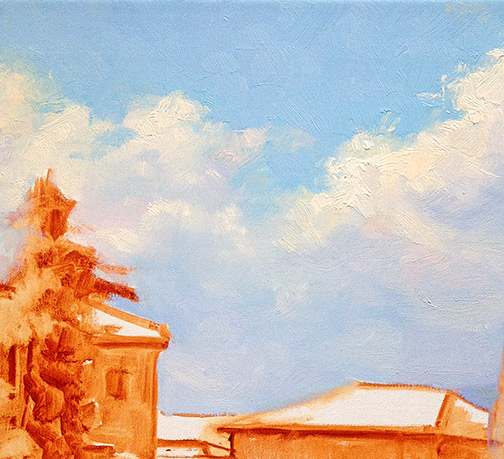
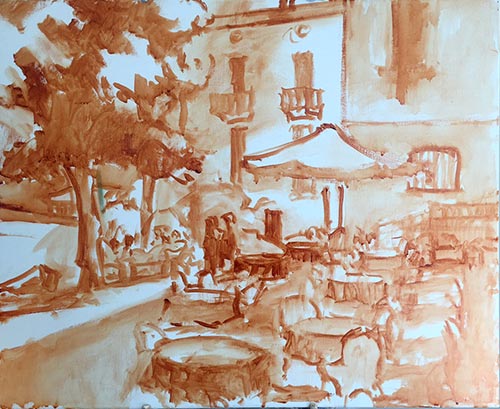
In the wake of the plein air weekend I wrote of in my last post, last week was mostly a recovery week for me. I did manage to get a new studio painting started, however. This is the initial tonal sketch on a 20x24" linen canvas.

Landscape painting tontal sketch by Jennifer E Young

This painting  may prove to be a challenge for me because much of this scene is in shadow. But there are a few pops of light that I am arranging in strategic places that I hope will carry the painting. Hey, you never know unless you try, right?

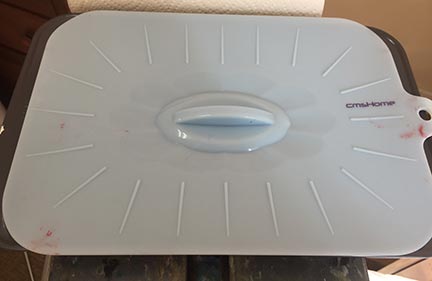
As with the other recent studio oils, I'm working with water miscible paints. One thing I'm noticing with these paints is that the paint blobs on my palette tend to gum up a little quicker once they are laid out, especially when I can't get back to the studio within a day. The manufacturer, Royal Talens recommends in their product info to mist the unused paints with a little water and cover  with foil to keep them moist and reduce the exposure to air. I have never liked putting plastic or foil directly on my paints though, because I feel that it wastes too much in the removal (yes I realize there is a bit of faulty logic in there but we all have our pet peeves).  So I'm experimenting with this:

What you are seeing is a basic 9x13" cake pan covered with a silicone doo-jobby that I found on Amazon. It is supposed to create an airtight seal, and the cake pan is deep enough that this cover-thing doesn't actually touch the paint. Whether it will be sufficient to keep the paint from oxidizing remains to be seen. I haven't been back at the easel since Saturday so I guess I will find out this morning when I go to work. I will report back with my findings, as well as an update on my progress with the painting, in an upcoming post.

Commissions, part III; wrapping it up!

In my last two posts, I took you through the proposal process of one of my recent commissions. If you wish to read this series from the beginning, start with Part I, followed by Part II. Today I'd like to share with you how the commissioned paintings turned out. I also have a few thoughts on commissions in general; both what to expect if you are a collector, and how to consider going about them, if you are an artist.

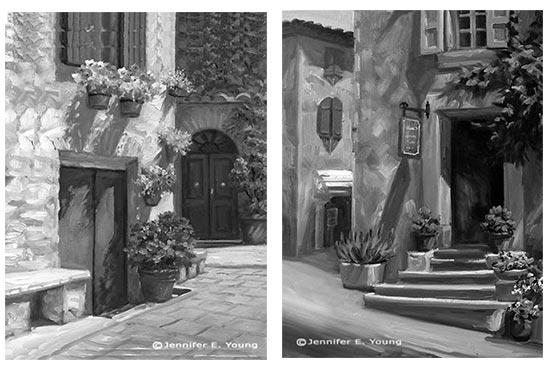
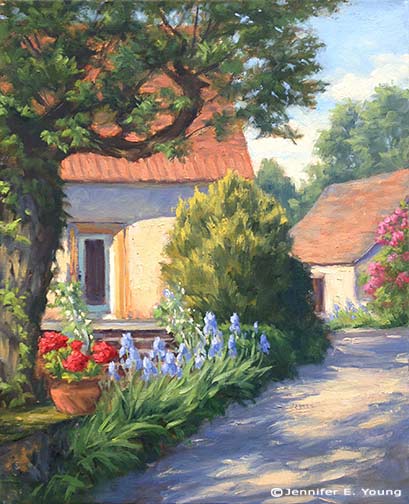
After having submitted my proposals for both of the paintings, I have now received the go-ahead to proceed. Here are the two completed paintings:
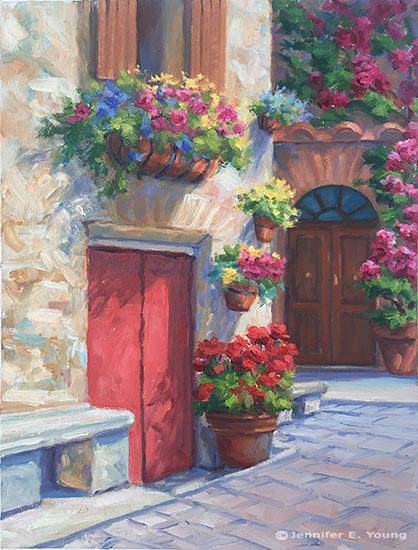
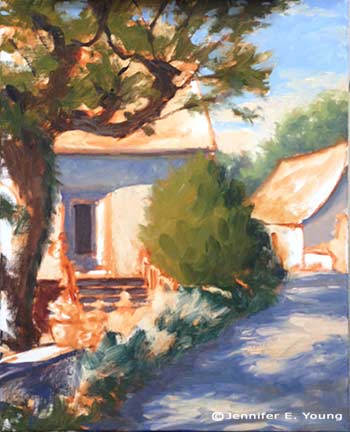
Italian village painting by Jennifer E Young

"The Potted Garden II", Oil on linen, 16x12"
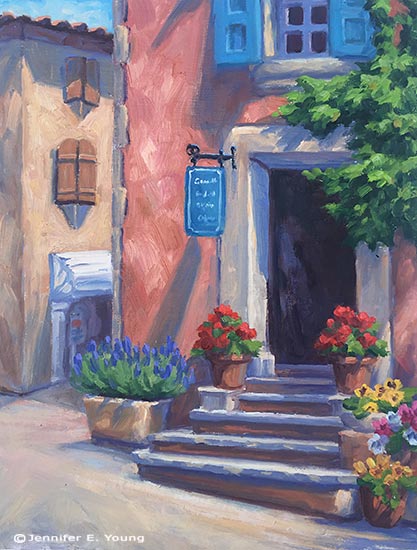
"The Corner Shop, Roussillon" by Jennifer E Young, All rights reserved "The Corner Shop, Roussillon", Oil on Linen, 16x12"

I'm very glad to say that the client expressed great satisfaction with the two paintings and they are now framed and in their new home.

Commissions are great experiences for artists because they push us to think about our art from a new perspective. Yes, as artists we all want our work to stand on its own. At the same time, nothing exists in a vacuum, and I am ok (and in fact, really flattered) with the knowledge that my paintings will coexist with other art in a collection, as well as other family heirlooms that will be important and valued by a family, possibly for generations.  So it's a great honor to even be asked about commission work and I am always happy to discuss that possibility and to converse in-depth about not only the art but the environment where the art is intended to be placed. With this in mind, here are a few things to note that make commissioned work a special animal, worthy (apparently) of three blog posts!

1) The Conversation

The conversation ( usually more than one) is probably the single most important element of any commission. This is the artist's opportunity to gather all of the relevant information about size, environment, and (very important) color preferences. Color, in fact, is the one topic that comes up rather emphatically in nearly every conversation I have with prospective commission clients. It's understandable, as color elicits so many varying emotions.

Ideally these conversations would be done face-to-face, but that is usually either not possible or practical. Most of my commissions have actually been negotiated, in fact, via email and phone. In these cases, Photoshop is definitely my friend!

2) The Proposal:

This is where I do my best to incorporate the ideas and desires of the client into a work of art. Sometimes, as in the examples I've provided in these last couple of posts, I have studies or compositions already worked out. In these cases, I just use my old buddy Photoshop.  More often, though, I am creating something from scratch. In these cases I will submit a  sketch with color notes, as well as a few of my photo references that I will use to incorporate some elements into the composition. The more visual examples given at this stage, the better.

3) The Approval:

The next step is to await the feedback of the client, or, if things go really smoothly, await the client's approval to proceed.

3) The Deposit:

This topic is often one that people don't like to talk about, but it's an essential part of many artists' working methods, so I am going to throw this horse right on out there on the middle of the dining room table. As artists, we need to decide for ourselves our best practices so that we feel good about the work we are doing.

Earlier in my career, I did not ask for a deposit for most of my commissions. As long as I felt like I was able to sell the work in a gallery if needed and that it didn't stray too far from the rest of my body of work,  I felt okay about working on speculation. Times change though and though the vast majority of my experiences were excellent, an odd one or two "hiccups", as well as certain life experiences (like having a child)  helped to shape my perspective on the boundaries I should set for myself and my work.

Nowadays, with few exceptions I require a deposit to proceed. This would occur once my proposal has been approved by the client.  The amount is either 1/2 down, or, if it is a very large and involved commission, 1/3 down, 1/3 at approval half-way, and 1/3 prior to delivery. Most collectors are okay with this arrangement and understand the whole working -for-compensation thing. I also think they appreciate that that it is to everyone's advantage that there is a commitment made to secure the agreement.

A deposit doesn't just cover an artist's materials, by the way. It also covers her time. Keep in mind that a proposal already commands a good deal of time and effort to prepare. Time is the most precious commodity I have. It is up to each individual to determine how they wish to work and what they want to spend their time working on.

4) Art Direction

Some artists are more ok with art direction than others. Having had a taste of the heavy-handed variety, I can most definitely state that I am not in favor. ;-) This is not to say that I am adverse to hearing client's preferences and feedback!  This is the whole point of "The Conversation", and I do welcome it if a minor adjustment is desired. However, I can't start over with a new concept, (which would mean a new painting) make profuse alterations, or do anything that I feel would greatly compromise the integrity of the painting.

Most clients understand, and I do my best to clarify in advance,  that any painting I make is going to be unique,  not  a copy--either of my own work or anyone else's . Beyond preference in color and subject, a collector commissions an artist because the artist has his or her own voice, and it's up to the artist, ultimately, to determine the best expression of their idea. In other words....Nobody puts Baby in a corner!

All joking aside, most people are really very happy to let the artist do her thing.  In fact, "that thing she does" is the whole reason the client was attracted to her work to begin with. Nevertheless, it's good policy, and indeed it's the artist's responsibility to clarify all of that with the client so that expectations are managed. Of course, every commission is unique and there are definitely nuances that  can vary my approach to a certain degree. The key is to keep communication lines open and to be open to honest feedback.

This just about wraps up my commission process, or at least the highlights. If there is anything I have missed, or if you have any questions, please feel free to leave your thoughts in the comments. If you are an artist, feel free to share how you handle your own commissions. I would most especially  welcome the thoughts of collectors (or potential collectors) also. Have you ever commissioned an artist? What was your experience? Let me hear from you!
Commissions part II

This post is a continuation of a prior post I've written on my commission process. If you missed it you can find that post here. Having secured the final approval for the first commission I wrote about yesterday, I needed to do it again for the second painting.  During my image archives search for a complementary composition I came across this 20x16" painting, done some years ago from my own photo references and sketches done on site. I felt this composition was similar enough in feel to relate to the first painting, and yet different enough to add some visual interest:

French village painting © Jennifer E Young

Because I wanted the  two little commissioned paintings to "talk to each other", I reversed the above painting, and scaled the image to 16x12". Like the first painting, this one also scaled really nicely to the new format:

French village painting of Roussillon by Jennifer E Young

Using my photo-shopped mock-ups, I provided a this shot below to show how the two paintings would look side by side:

Vibrant paintings of French and Italian villages by Jennifer E Young

There were a few color notes to keep in mind. The client wanted these to pieces to go in a room with an open floor plan where other artwork was already present. There was one painting in particular, a large pastoral with a red barn, that I needed to be cognizant of when creating my pieces. I didn't need to "match" the red, but I needed to be aware of it so as not to clash. This painting had a mid-to-cool temperature red focal area, so I'd steer away from anything too orangey. There were also some lovely aubergine and turquoise accents  in the shadows of the large painting that I noted and would attempt to riff off of in the paintings I was about to create.

My collector gave a big thumbs up to the ideas I had proposed. Whew! Awesome! Now for the fun/hard part of creating them! In my next post I'll show you how everything came together in the final paintings, and provide some thoughts to keep in mind about commissions in general, which I think will be of interest to the collector and artist alike.

Winter Sunset complete

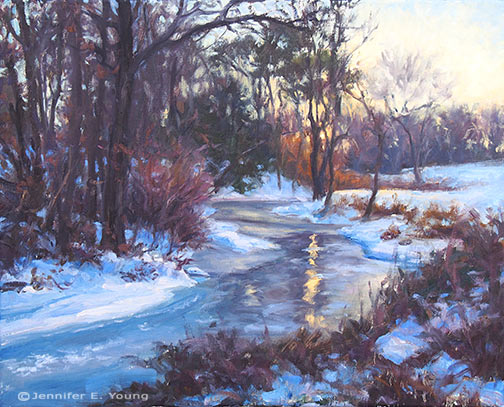
This morning I finished up my snow painting, the start of which I blogged about in my last post. Here is the final:

Winter sunset landscape painting by Jennifer Young, All rights reserved"Winter Sunset, North Run Creek" Oil on linen, 16x20" Click here for more info. To purchase, please contact me.

This was one of those paintings that I was excited about from concept to finish. It had the feeling of a sunset, a snow painting, and a nocturne, all in one. I actually didn't want it to end.

I experimented with a new blue on my palette, which I am really enjoying--Indathrone Blue (Grumbacher). It's really a versatile and beautiful color.  It's along the lines of a Pthalo Blue, though not nearly as highly staining. I find that both Pthalo blue and green can easily take over a paint mixture with anything beyond the tiniest touch. (They also seem to have a way of getting all over me very easily!) Indathrone is different. It's transparent, less intense than Pthalo but "cleaner " than Prussian Blue, and very versatile to work with. I used it in various mixtures throughout the painting, but you can see a good bit of it in its purest form (tinted with white), in the frozen section of the creek on the lower left.  I doubt it will take the place of my tried and true Ultramarine, but it's a nice addition to have on the palette, and I can see a lot of potential for its use in still life and nocturnes.

Let it snow

Here in Richmond, VA, we aren't used to getting around in the snow and ice. At the first hint of snow in the forecast, people storm the stores, and stock up on bread, milk, eggs, water,  booze, etc. (you know, all the staples) . In fact, many times the shelves are picked clean.  As for the schools, even a dusting seems to shut them down. In fact, I joke that the whole city shuts down if someone has dandruff. Last week we had about 6 inches, and school closed for the entire week. Granted, there were a few days of below freezing temperatures as well. Everything melted nicely away (finally!) and then this week we had another two days out from snow. Well, the snow might not bother Elsa, (or at least that's what I have heard many, MANY times during our little break) but as much as I love building snowmen, it sure puts a wrench in our routine after a while.

It is pretty though, I'll give it that.  So today I decided to embrace what is instead of wishing for what isn't. And here's the outcome of that shift in mindset. For this 16x20" canvas, I am referencing  photos I took right about sunset during our first round of snow as we were on our way for dinner out (because the roads were totally FINE).

Snow at sunset landscape painting by Jennifer E YoungWinter landscape painting in progress by Jennifer E YoungWinter landscape painting in progress by Jennifer E Young

I  apologize for not getting better blow by blow photos of the progress, but I  was on a roll. I almost made this a completely alla prima piece, which felt soooo great,  but (cut to the sound of a needle scraping across a record)  I ran out of time. I think I had a very good start though, so one more session before it sets up too much ought to do me.

New Lake Como painting in progress

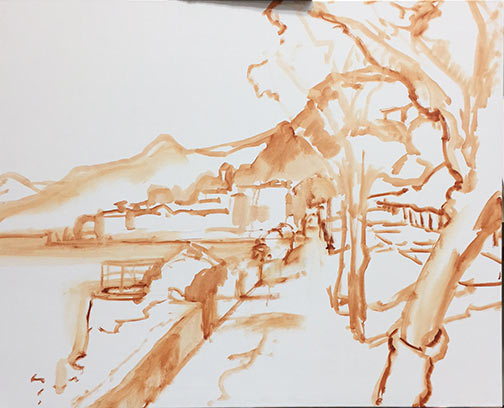
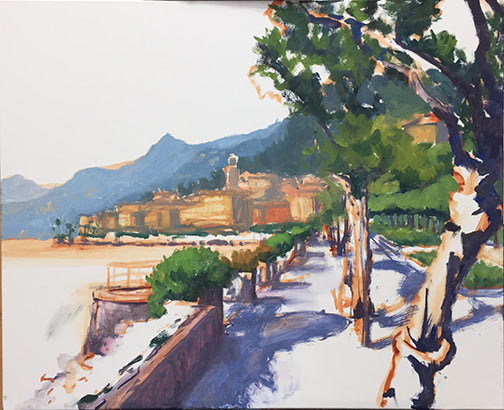
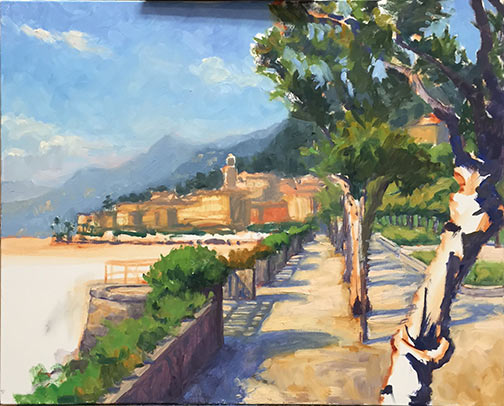
School's out this week due to snow, so my painting time is catch as catch can. Nevertheless, we have been conspiring with other desperate parents to arrange play dates here and there, which allows a little painting and blogging time. So I thought I'd share the Bellagio painting I have my easel this week. This is a promenade on the outskirts of bella Bellagio, leading to the stunning grounds of the Villa Melzi.  This view however, looks back towards the town. Apologies in advance for the poor quality photos and the cast shadow of part of my easel on the painting. I don't have a lot of time to photo edit anything but the final these days, so I hope you will bear with me. I start in the usual fashion, with a loose sketch of my composition in Burnt Sienna:

Lake Como painting demo by Jennifer Young

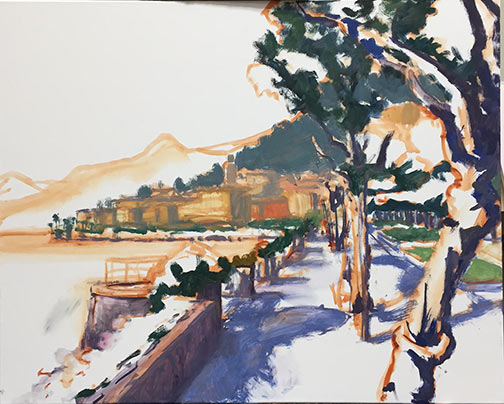
Next I lay in the shadow family and darkest notes.

Lake Como painting demo by Jennifer Young

At this point I'm laying in some general blocks of color. Still no highlights yet...

Lake Como painting demo by Jennifer Young

And here's my starting point this morning:

Lake Como painting demo by Jennifer Young

Next I will continue blocking in, including the water and distant village. I'm still working up the nerve to paint outside while there's snow on the ground, but we will see. Not much of a fan of the cold, but that snow sure is pretty.

Still life...trying again

The last time I attempted a floral still life painting, it all went south. But, since I have been wanting to build a more regular practice of painting and drawing from life, and since it is nothing but brown and gray outside right now in Virginia (not to mention that I don't tolerate the cold too well) I decided not to let a little past  failure hold me back. And as they say, it's in the failures where we have great opportunity to learn and grow. It sounds a bit cliché but it's also actually true, especially if you don't let the failures wig you out. I have to admit, at first I did duke it out with the old psyche a bit, but upon reflection I realized that I really did learn a few lessons from my last effort. For one thing I learned that I didn't really set myself up for success to begin with. I basically walked in, put some flowers in a vase, set them on a table and went to it. How hard could it be? Wellll....

The first problem was that there is actually quite a lot that goes into setting up a nice still life. I figured since it had been a very long time I would keep it simple by focusing on just the flowers and a vase, and no other extraneous objects. Only extraneous objects were all around my prior "setup" (if you could call it that.) The utility sink was in the background, as well as pictures hanging on a wall, art supply bins nearby, etc.  It's not impossible to paint that stuff out, but it is pretty distracting.

Secondly, in my previous attempt, the lighting was completely flat and non directional. That's great for studio lighting in general, but it makes it harder to create form and good color without that definitive light and shadow. I felt like it was kind of akin to painting outside on a gray day.

So the first order of business was to remedy these issues, and create an environment where I would be "set up" for success.  Once I found a solution to my setup issues (which I will share in my next post) I felt like I had more control.

Here's how it went down, in various stages:

Initial design in a wash of cobalt blue, burnt sienna, and chromatic black:

Still life floral painting demo by Jennifer E Young

Blocking in; shadows first, then midtones:

Still life floral painting demo by Jennifer E Young

Fleshing it out:

Still life floral painting demo by Jennifer E Young

Still life floral painting demo by Jennifer E Young

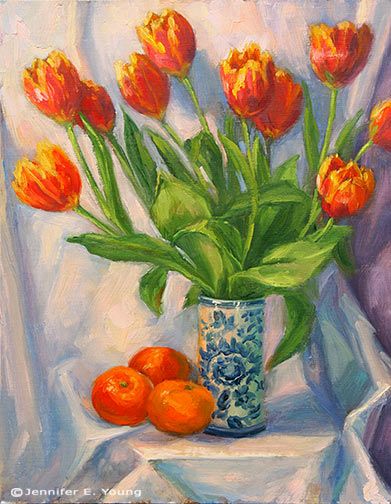
And the final:

Still life floral painting Tulips and Mandarins by Jennifer E Young"Tulips and Mandarins" Oil on Linen, 14x11" Click here for more info!

A new year, a new painting

Welcome to 2015! I will spare you the laundry list of lofty goals or resolutions, mainly because I don't have one! Seriously though, my one overarching goal for this year is to paint more often and more consistently. That shouldn't be too hard to obtain, right? I've had some obstacles lately but they are not insurmountable, and to prove it, here is a new studio piece I've been blocking in:

Lake Como Italy landscape painting in progress by Jennfier E Young

This composition might look familiar to you. And there's a reason for that! It's based on a little gouache study I did not too long ago, only scaled up considerably (from 4x5" to 20x24") and in oils. Much more to go on this, but it's a decent start, and the year is young.  ;-)

Dordogne Breeze

Here is the final version of the painting I posted in progress yesterday:

French landscape <!-painting by Jennifer E Young "Dordogne Breeze" Oil on Linen, 20x16" Click here for more info. Contact me to purchase!

The fun thing about this painting is that I used a lot of paint, which made working the edges really easy and enjoyable to manipulate. Truth be told, I had originally planned to have more elements  in the painting, (sheep, additional buildings in the distance) but in the process of painting it I decided I liked the simplicity of it with just a very few dominant shapes. Those other elements can wait for another composition, another day. This has been a good reminder to myself that I do not need to say everything in one painting, and to just let the brushwork speak for itself.

French landscape; new and in progress!

It feels like it has been ages since I posted a new work in progress. That is probably because it has been! This kitchen renovation really sidelined me more than I imagined. The new kitchen was in the studio and the old was completely gutted. For weeks. We live in a small house and there was no room at all to store the new stuff, so for a while we could barely walk around without tripping into something or shimmying by someone fast enough to avoid being stapled or drilled. Add to that mix  a couple of family illnesses and a trip or two, and here we are in December already.

French landscape painting in progress by Jennifer E Young

The kitchen still isn't done but at least my studio has been freed from floor-to-ceiling cabinetry, boxes, and debris (not to mention a table saw or two). So today I actually started something new. It feels good! This is a 20x16" and a fairly simple composition. But I wanted to keep it alla prima and fresh and airy, and for my first time back at the easel I wasn't looking to plunge into a large complicated piece. It's not done yet, but I think will be very  soon. When it is I will post it here, of course, and with a much better quality photo.

New floral still life (WIP)

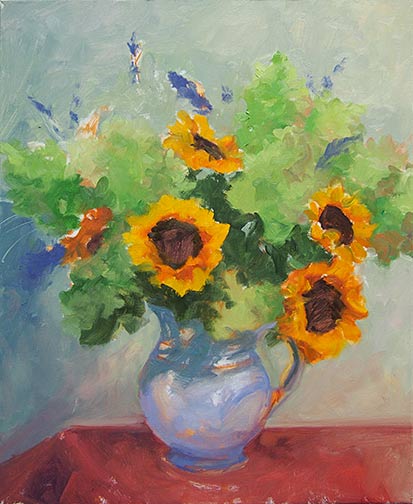
I wish I could say that I was as passionate a flower arranger as I am a gardener, but I'm afraid to watch me make the attempt, you'd likely think I was wrestling the blooms into submission rather than celebrating a creative act. Maybe one day I will learn, but at present, my arrangements are pretty tenuous, and they only  look ok as long as you don't look at the back! But I have these great blooms right now in my garden from my massive Limelight Hydrangea, and I have been really wanting to capture them in paint before they are done for the season.

The shrub itself is far larger than I imagined it would be for my space (probably topping out at 8 or 9 feet by now) , but then that is true of just about everything in my garden! The blooms start out a lovely creamy white, and then turn a gorgeous lime green tinged with pink by season's end. Then the other day while shopping I saw these sunflowers lined up like happy little children, so I grabbed a bunch to add to the mix, and an arrangement was born.

It's been a while since I have painted a floral, but I really feel it's so important to regularly practice working from life, and it's been raining an awful lot this last week. So, with fall lurking just around the corner and my flower garden in its final days, I finally felt inspired to give it a go. (Better late than never, I guess!) Here, below,  is the initial block-in on my 24x20" linen canvas.

floral still life painting in progress by Jennifer E. Young

This is about 3 hours' work. I try not to get too detailed yet, but I have my basic pattern down so that I can jump right in when I return to the easel.

Large Hatteras Island Painting -complete!

Here is the final version of the painting I have been working on for the past week or so:

coastal andscape painting of the NC Outer Banks by Jennifer E. Young

"To the Sea" Oil on Gallery Wrapped Canvas, 30x40" Click here for more info, or contact me to purchase!

I had such a good time painting this piece I didn't want it to end. The  several prior studies I did of this subject (most of them on location) really helped to inform me about color choices and brushwork, and also, more importantly, they brought back the strong emotional connection I have with the subject. I felt like I was on vacation all over again. Don't get me wrong, this was work, too, but it is this kind of view that I see on summer vacations to the Outer Banks  when I step out on the deck in the morning to sip my first cup of coffee. For me it recalls a time to let  all the cares go and just relax!

Progress on the large Hatteras painting

Here are a few progress shots on the Hatteras Island Dunes painting I last blogged about:

Work in progress landscape painting by Jennifer E. YoungWork in progress landscape painting by Jennifer E. YoungWork in progress landscape painting by Jennifer E. Young

Though I am trying hard to address the picture as a whole, it is some kind of work just getting the canvas covered. I have been painting pretty small lately so I am kind of shocked at the amount of paint I'm mixing and using. I think this is especially true because I'm not used to using such an absorbent surface.

In the process of working solely from my painted studies, I've noticed that one of the main reasons I love the smaller alla prima pieces is the amount of broken color in the painting. Color is laid next to color, sometimes within the same stroke, and brush strokes aren't overly licked or blended. The result is that you can achieve a really fresh look with the little ones. It's not impossible to do this with the larger paintings, but you do have to really work wet-into-wet the whole time, and start loading on the paint to get that kind of effect. To have that kind of expectation with a painting of this size may very well be an exercise in futility, especially since I am not able to paint on it every day. On the other hand it is really impossible to replicate stroke-for-stroke what I have done in the smaller studies, as the brush size-to-canvas ratio would mean I'd likely have to turn to using house paint brushes!

So with these "reality checks" in mind, I am still striving to capture that fresh, breezy, beachy essence, even if the nature of this beast is very different from the original. I find myself working more background to foreground on the bigger paintings (rather than strictly dark to light) in order to keep the paint surface workable. Nevertheless, I am saving most of the lightest highlights toward the end because they are the most opaque and have the thickest application.

French landscape painting in progress

School's out for summer today so over the next couple of weeks we will be in transition mode as we settle into a new summer schedule.  I'm painting this French 16x20" landscape IBKT,  (in-between kid time) and I forgot to photograph this as a step by step.

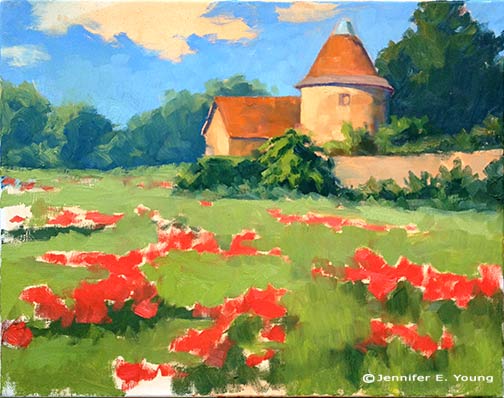
French landscape with poppies in progress © Jennifer E Young

I started this late yesterday and today I'm trying to address the  whole canvas in a general way first,  so that when I return to the easel I can jump right in to the next level of detail. I really hope I can work on this wet into wet the whole time though, as it's so much easier to manipulate edges when the painting remains open. It needs a lot more work, obviously, but I'm enjoying the simplicity of this composition so far.

Shadows of Frayssinet (W.I.P. complete)

I've been doing a little plein air painting lately, some of which I will share here soon. But lately it seems like I either have time to paint or post, and I guess I have chosen painting. (Sorry blog!) I do have a completed studio painting to share today though, the beginnings of which I posted right before preschool spring break!

French village painting by Jennifer E. Young"Shadows of Frayssinet" Oil on linen, 20x16" SOLD

This is in the lovely little village of Frayssinet in the oh so lovely Lot Valley of France. I  enjoyed this so much that I plan to do a companion piece to this one of a different cottage from the same town, in the same size and orientation.

Frayssinet shadows W.I.P.

I had a rough time painting last week. Plein air season is upon us and I have been waiting with baited breath for the weather to cooperate so I'd have the  opportunity to get outside again. But there are just some times when the odds seem stacked against me. Some of the prettiest, mildest days turned out to be mommy-duty days for me. My painting days were full of wind and intermittent clouds and showers. I did get myself outside but the wind and weather weren't cooperative and I ended up coming home with a couple of wipers. That's the risk of plein air painting. Just because you put in the time, it doesn't mean you will come home with a keeper. And with such limited time, it can be hard to justify the effort. So why do I do it? Well, it challenges me to think on my feet and  be in the moment. It gets me out of my comfort zone, and when its not frustrating the hell out of me,  it's pretty fun and exciting.

It also gets me jazzed for new paintings in the studio, which is what leads me to my current post. I started this piece after one of those frustrating wipers, and by comparison to my battle with the wind, it felt good to just paint! At this point I am just settling on my composition and laying in some of the shadows and highlights. This will be a painting of a little street in Frayssinet, a tiny village tucked in the Lot Valley of Southern France:

French village painting by Jennifer Young

Southern France painting by Jennifer E Young

I painted another version of this scene with different light and a different orientation before, but this painting will focus more on the little cottage to the left  in the foreground. The cast shadow across the top of the canvas is from my easel. Sorry about that! I'll try to get better progressive shots as I go along.

Hatteras Island study

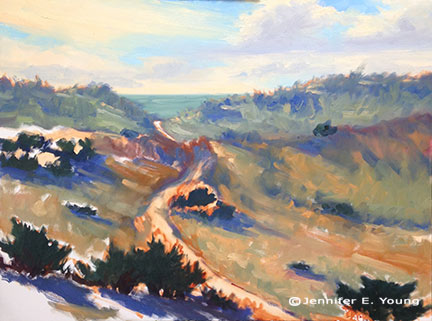
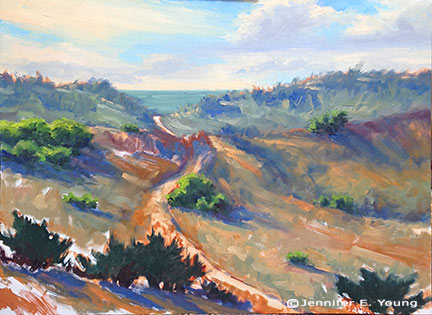
I once had a painting of the Outer Banks that I loved; but for whatever reason didn't sell. It was in my inventory for a number of years, so instead of confining it to the bins any longer, I decided to embrace the fact that I still had possession of it. In fact, I decorated my bedroom around it, painting the walls a beautiful soft gray color that perfectly picked up some of the muted tones in the painting. Unbelievably, two weeks after I had my beautiful "new bedroom" complete, I received a call from a collector asking if it was still available. Yes, I sold it. I am trying to run a business, after all. I do have one or two pieces that I am trying to keep for myself, but for the most part, I'm just not one to turn down sales. So what does this have to do with the painting below? No, it's not the "one that got away" (you can see that one here). This piece is one of a few studies I'm working on in preparation for  a large new painting I intend to hang (at least for a little while) in my now repainted bedroom. Well,  I had a nice big gallery wrapped 30x40" canvas, and a nice blank wall, so I figured, why not?

Landcape painting of Hatteras Island by Jennifer E Young

"Hatteras Dunes, Study I" 6x8" Oil on Canvas

This study is based on two different plein air paintings I did on Hatteras Island on recent family vacations. I am largely basing my composition on a piece called "Hatteras Island Dunes II". But because that painting was 8x10" (a 4:5 ratio), I have to make a few compositional changes to format the new piece to a 30x40" gallery wrapped canvas (3:4 ratio).

As you can see in this new composition, I have changed the direction of the sandy path that leads to the beach and rearranged some shrubs somewhat. I also felt like I wanted a bit more sky showing than in the plein air, so I have lowered the horizon a touch to allow for that. For the sky I am loosely referencing both the above mentioned plein air, as well as another plein air piece from last summer, which you can see here.

I don't seem to have any actual photos of these scenes to reference, so my sole references are my plein air paintings. This is a bit different for me as I usually use both a photo source and my painting when I work from plein air to studio. So it will be interesting to see if I can make this fly! My plan is to try at least one more study before launching into the big canvas, but this is a good start.

Sunlit Harbor, Varenna (painting complete)

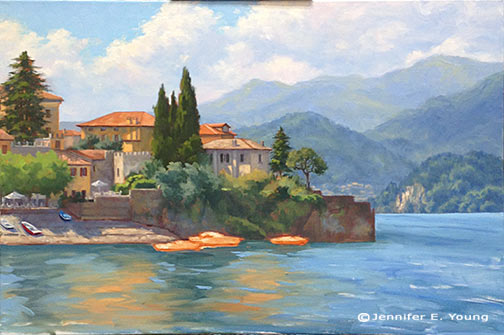
Happy Spring everyone! It's been a looong winter, and I honestly don't think anyone could be much happier about a change of seasons than I am! Any way, to kick off the new season I will wrap up my painting of the Varenna Shoreline. Below you will see I've gotten the buildings of the village fleshed out and am just launching into addressing the water:

Varenna landscape painting in progress by Jennifer E Young

Next I work on getting the boats laid in, and adding a little more detail and highlights to the shrubs and trees perched along that wall.

boats

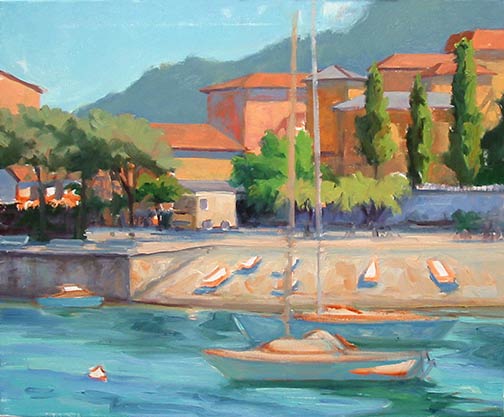
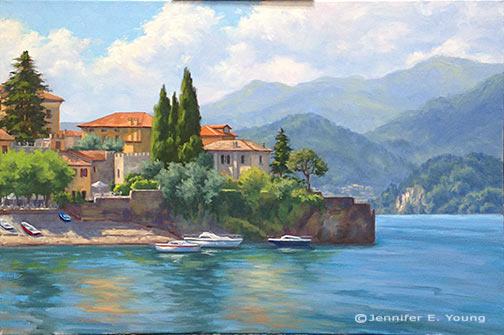
Then the final touches of the masts and buoys are laid down. I use a liner brush to lay in the delicate lines of the masts, starting from bottom to top. A mahl stick really comes in handy here to steady my stroke. At this point I am nearing completion. I may go into it again, but I am going to sit with this a while and start in on something new. If it's not 100% done, it is close.

Lake Como landscape painting by Jennifer E Young "Sunlit Harbor, Varenna" Oil on linen, 24x36" Click here for more info!

Light and Edges; Varenna painting progress (W.I.P.)

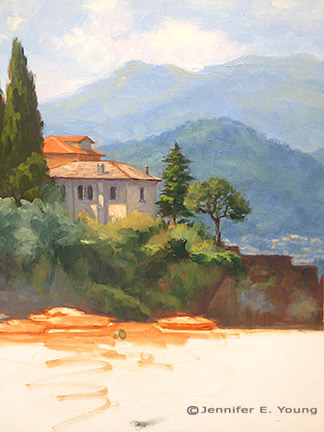
Here is some progress to report on the Varenna painting  I've been working on.  In my last post I had pretty well laid out the background. But when I came back  to the easel again I decided that before jumping into the foreground I should add a little more contrast to the nearest mountains and soften up some edges to the distance overall.

Painting edges by Jennifer E. Young

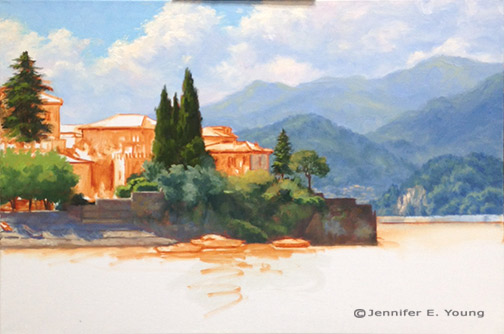
That done, I address the walled village of Varenna next. I want to establish the village before the water, so that when I get to the water I will be able to properly address the reflections. First, I set about laying in the darkest passages.

Lake Como Italy painting in progress by Jennifer E Young

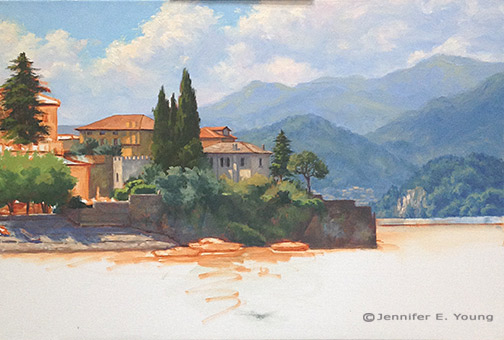
Next I start in on the buildings. The direction of the light is upper left. This was close to 11 a.m., so the sun is high but not directly overhead. Even so, I think with the movement of those clouds and the way the trees and shrubs are positioned, there are some interesting shadows being cast on the buildings. I hint at this in my study, but in the larger composition it took some time and concentration to get it to look right.

Varenna Italian landscape painting by Jennifer Young

Here's where I am this morning with the painting. I'll be working on this today and again Wednesday, so assuming nobody gets sick and we don't get more snow  I will have some more progress to report this week!

Italain landscape painting in progress by Jennifer Young

Varenna's dramatic skies (W.I.P. continued)

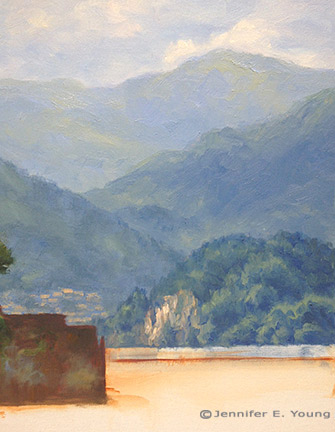
When I traveled to Bellagio and Varenna, one of the things that struck me about the landscape was the dramatic cloud formations that settled over these little lake towns. Possibly this is due to the altitude, or the difference in altitude between the lake and the surrounding mountains. OR, it could have just been my timing. In any event, while they were very beautiful and created spectacular displays, they also made  it pretty tricky to sketch/paint en plein air because the daggone light kept changing from minute to minute. In the studio, of course all of that is much easier to control, and I get to celebrate the beauty of the clouds without at the same time cursing the inconvenience of them ;-). After I sketch in my composition, my most common approach to landscape painting is to lay in the sky and the far distance. Since the sky contains my light source, the highlighted sides of the clouds will hold some of the lightest values in the painting. Probably the only other things that approach this high value is the light bouncing off of the white painted boats.

Landscape painting of Varenna Italy in progress by Jennifer E Young

I am not sure if it's evident in this photo, but I have used an array of colors(cad orange, cad red light, alizarin permanent, ultramarine and sevres blue) to tint the clouds. The blue sky is a combo of ultramarine, sevres blue, and white.

landscape painting clouds detail by Jennifer Young

Next distant mountains progressively deepen in value, but they are still very cool in temperature, so that they will sit back behind what's to come in the foreground. After evaluating my composition further, I decided to raise the distant horizon line, so as to push those cliffs back a bit more, in relation to the foreground town.

Lake Como landscape painting in progress by Jennifer E. Young

 After I get the painting a little further on, I may come back and tweak what I've done here. But for now  it's time to address  the water and the heart of the matter; the town of Varenna.