Commissions, part III; wrapping it up!

In my last two posts, I took you through the proposal process of one of my recent commissions. If you wish to read this series from the beginning, start with Part I, followed by Part II. Today I'd like to share with you how the commissioned paintings turned out. I also have a few thoughts on commissions in general; both what to expect if you are a collector, and how to consider going about them, if you are an artist.

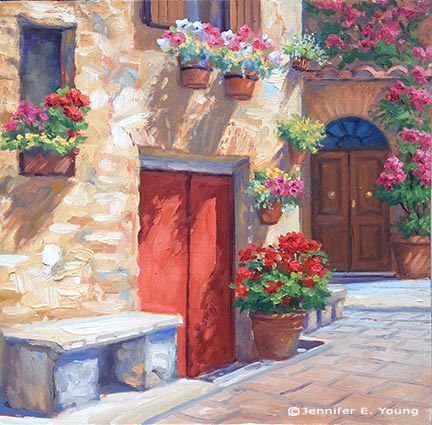
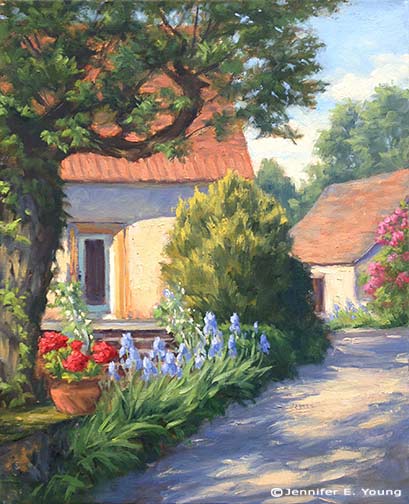
After having submitted my proposals for both of the paintings, I have now received the go-ahead to proceed. Here are the two completed paintings:
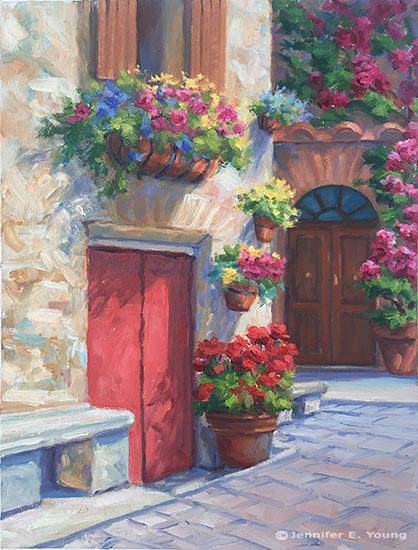
Italian village painting by Jennifer E Young

"The Potted Garden II", Oil on linen, 16x12"
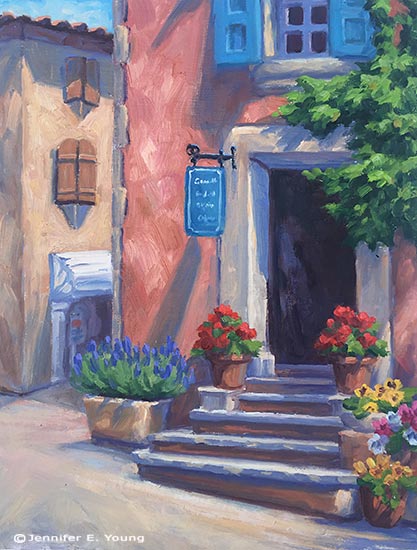
"The Corner Shop, Roussillon" by Jennifer E Young, All rights reserved "The Corner Shop, Roussillon", Oil on Linen, 16x12"

I'm very glad to say that the client expressed great satisfaction with the two paintings and they are now framed and in their new home.

Commissions are great experiences for artists because they push us to think about our art from a new perspective. Yes, as artists we all want our work to stand on its own. At the same time, nothing exists in a vacuum, and I am ok (and in fact, really flattered) with the knowledge that my paintings will coexist with other art in a collection, as well as other family heirlooms that will be important and valued by a family, possibly for generations.  So it's a great honor to even be asked about commission work and I am always happy to discuss that possibility and to converse in-depth about not only the art but the environment where the art is intended to be placed. With this in mind, here are a few things to note that make commissioned work a special animal, worthy (apparently) of three blog posts!

1) The Conversation

The conversation ( usually more than one) is probably the single most important element of any commission. This is the artist's opportunity to gather all of the relevant information about size, environment, and (very important) color preferences. Color, in fact, is the one topic that comes up rather emphatically in nearly every conversation I have with prospective commission clients. It's understandable, as color elicits so many varying emotions.

Ideally these conversations would be done face-to-face, but that is usually either not possible or practical. Most of my commissions have actually been negotiated, in fact, via email and phone. In these cases, Photoshop is definitely my friend!

2) The Proposal:

This is where I do my best to incorporate the ideas and desires of the client into a work of art. Sometimes, as in the examples I've provided in these last couple of posts, I have studies or compositions already worked out. In these cases, I just use my old buddy Photoshop.  More often, though, I am creating something from scratch. In these cases I will submit a  sketch with color notes, as well as a few of my photo references that I will use to incorporate some elements into the composition. The more visual examples given at this stage, the better.

3) The Approval:

The next step is to await the feedback of the client, or, if things go really smoothly, await the client's approval to proceed.

3) The Deposit:

This topic is often one that people don't like to talk about, but it's an essential part of many artists' working methods, so I am going to throw this horse right on out there on the middle of the dining room table. As artists, we need to decide for ourselves our best practices so that we feel good about the work we are doing.

Earlier in my career, I did not ask for a deposit for most of my commissions. As long as I felt like I was able to sell the work in a gallery if needed and that it didn't stray too far from the rest of my body of work,  I felt okay about working on speculation. Times change though and though the vast majority of my experiences were excellent, an odd one or two "hiccups", as well as certain life experiences (like having a child)  helped to shape my perspective on the boundaries I should set for myself and my work.

Nowadays, with few exceptions I require a deposit to proceed. This would occur once my proposal has been approved by the client.  The amount is either 1/2 down, or, if it is a very large and involved commission, 1/3 down, 1/3 at approval half-way, and 1/3 prior to delivery. Most collectors are okay with this arrangement and understand the whole working -for-compensation thing. I also think they appreciate that that it is to everyone's advantage that there is a commitment made to secure the agreement.

A deposit doesn't just cover an artist's materials, by the way. It also covers her time. Keep in mind that a proposal already commands a good deal of time and effort to prepare. Time is the most precious commodity I have. It is up to each individual to determine how they wish to work and what they want to spend their time working on.

4) Art Direction

Some artists are more ok with art direction than others. Having had a taste of the heavy-handed variety, I can most definitely state that I am not in favor. ;-) This is not to say that I am adverse to hearing client's preferences and feedback!  This is the whole point of "The Conversation", and I do welcome it if a minor adjustment is desired. However, I can't start over with a new concept, (which would mean a new painting) make profuse alterations, or do anything that I feel would greatly compromise the integrity of the painting.

Most clients understand, and I do my best to clarify in advance,  that any painting I make is going to be unique,  not  a copy--either of my own work or anyone else's . Beyond preference in color and subject, a collector commissions an artist because the artist has his or her own voice, and it's up to the artist, ultimately, to determine the best expression of their idea. In other words....Nobody puts Baby in a corner!

All joking aside, most people are really very happy to let the artist do her thing.  In fact, "that thing she does" is the whole reason the client was attracted to her work to begin with. Nevertheless, it's good policy, and indeed it's the artist's responsibility to clarify all of that with the client so that expectations are managed. Of course, every commission is unique and there are definitely nuances that  can vary my approach to a certain degree. The key is to keep communication lines open and to be open to honest feedback.

This just about wraps up my commission process, or at least the highlights. If there is anything I have missed, or if you have any questions, please feel free to leave your thoughts in the comments. If you are an artist, feel free to share how you handle your own commissions. I would most especially  welcome the thoughts of collectors (or potential collectors) also. Have you ever commissioned an artist? What was your experience? Let me hear from you!

Commissions part II

This post is a continuation of a prior post I've written on my commission process. If you missed it you can find that post here. Having secured the final approval for the first commission I wrote about yesterday, I needed to do it again for the second painting.  During my image archives search for a complementary composition I came across this 20x16" painting, done some years ago from my own photo references and sketches done on site. I felt this composition was similar enough in feel to relate to the first painting, and yet different enough to add some visual interest:

French village painting © Jennifer E Young

Because I wanted the  two little commissioned paintings to "talk to each other", I reversed the above painting, and scaled the image to 16x12". Like the first painting, this one also scaled really nicely to the new format:

French village painting of Roussillon by Jennifer E Young

Using my photo-shopped mock-ups, I provided a this shot below to show how the two paintings would look side by side:

Vibrant paintings of French and Italian villages by Jennifer E Young

There were a few color notes to keep in mind. The client wanted these to pieces to go in a room with an open floor plan where other artwork was already present. There was one painting in particular, a large pastoral with a red barn, that I needed to be cognizant of when creating my pieces. I didn't need to "match" the red, but I needed to be aware of it so as not to clash. This painting had a mid-to-cool temperature red focal area, so I'd steer away from anything too orangey. There were also some lovely aubergine and turquoise accents  in the shadows of the large painting that I noted and would attempt to riff off of in the paintings I was about to create.

My collector gave a big thumbs up to the ideas I had proposed. Whew! Awesome! Now for the fun/hard part of creating them! In my next post I'll show you how everything came together in the final paintings, and provide some thoughts to keep in mind about commissions in general, which I think will be of interest to the collector and artist alike.

The making of a commission

It's hard to believe summer is almost over. The move of my home and business, along with family matters, tended to completely monopolize my spring and summer, and yet there is still so much to do.   While we are slowly settling into the house, it will be some time before I have a studio. So I have "made do" with either painting outside in the blazing summer heat, or setting up a temporary studio with drop cloths in my poorly lit living room. For those reasons, my painting production has been down and it's been driving me a little crazy. Nevertheless, opportunity waits for no one, and commissions are a special kind of opportunity. Time to pull out the drop cloths and shop lights again! :-)  I have been painting for 20 years, and in that time, I've had a variety of commissions. Some are more "challenging", and some are pure delight. Of course, the latter are more pleasurable, but all commissions have been, to me, opportunities for growth as an artist.

My latest commission, in spite of my less than ideal work environment,  fell distinctly in the realm of the delightful. I met the client during a painting demonstration at the Little Gallery where my work was being featured in June. He happened to love one of my paintings in that show, called "The Potted Garden, Pienza":

pienzawf_final

The only issue was that the format (square) wasn't quite right. He was looking for a slightly larger, more vertical painting, and a companion piece of the same size to complement it in an adjacent spot.

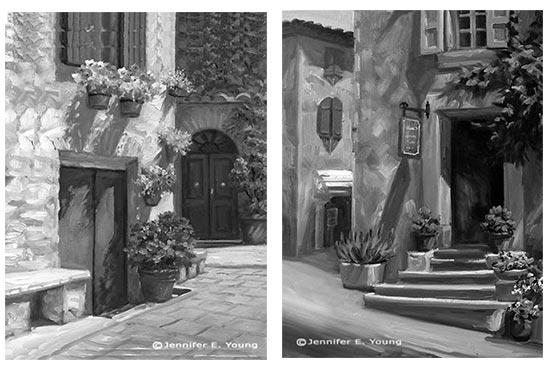
I loved this little scene and I was happy to explore it again with a different format. So my first task was to convert my square composition to a vertical piece. Luckily, the architectural subject matter leant itself to the task naturally, and I was able to use Photoshop to render a "sketch" for a proposal in much faster time than I would have been able to do free-hand:

grayscale composite mockup ©Jennifer E Young

As you can see, I didn't labor over rendering the upper portion. The purpose was just to continue it upward to demonstrate how it would look. (Photoshop is a very expensive program, but nothing beats it for working out compositional options for paintings!)

In all honesty, because the location of the focal point was in the right position for both the original 12x12"  and the commissioned 16x12" format,  I didn't have to do much to the composition of the original painting beyond extending it. That's not always the case, believe me, but this time things worked out really well. But because I was losing a window on the upper left, I did suggest that I replace the two flower pots under the window for a larger, single hanging basket, as this would give this area more unity.

Once I received the client's approval for my proposal of the first painting, I set to work finding a second composition that I would create as a companion piece. I'll cover that in the next installment. Stay tuned!

First painting since the move!

After re-reading my post from yesterday I started to feel like a wimp, complaining about the heat and all. Then I tried it and realized that heat stroke does not improve your art one iota! All kidding aside, it was boiling lava hot outside on my patio. I only lasted about an hour before I decided I'd have to leave it until the next day, and pick up where I left off. And so I painted this piece over two sessions, noting the time of day and returning to wrap up at the same time this morning.

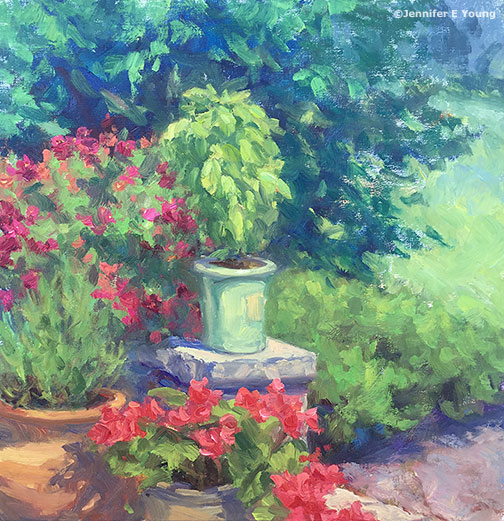
plein air garden painting by Jennifer E Young, All rights reserved "A Taste of Summer" Water soluble oils on Linen, 12x12" To purchase, contact me!
This little outdoor still-life setup includes the herbs and flowers I brought from my old place, as well as a big beautiful housewarming gift from our new neighbors (the pink and orange spray behind the basil). A  marriage of old and new,  I felt it was the perfect subject to kick off this new beginning.

I experimented with this painting using Cobra water-soluble oil paints by Royal Talens . I was inspired to try them when I started following the very talented painter Mark Hanson's discussions about them on Facebook and on his blog. I have friends who use water miscible oils, too, but having tried them before without success I haven't been compelled to try them again. But when Mark suggested that his migraine headaches may have gone away after switching to these oils, I took notice and decided to try this new (to me)  line of paints myself.

I have suffered from insomnia for years, and yet ever since we moved to the new house, I have only had two bad nights. That's pretty incredible! Coincidentally, with the exception of yesterday and today,  I have not painted since we've been here. Is it possible there is some other reason for my newfound improved sleep? Absolutely. But it's also possible the fumes were getting to me and I didn't even realize it. It has also bothered me for a while that I am eating as much organic and natural food as I can afford, I'm also inhaling volatile organic compounds on a daily basis in my work. And if we ultimately decide to set up my studio in our current attached garage, water soaked paper towels are  going to be a lot safer than ones soaked with mineral spirits, odorless or not!

I first tried water-soluble oils several years ago. I believe they were Winsor & Newton's Artisan series. At the time I found the handling too gummy and tacky and not to my liking at all. I may not have given them a fair shake though, because in recent weeks I have read that you really should not thin your paints with water or it will produce that tacky, gummy effect and make the paints rather dull and cloudy looking. Instead, Mark advised not to rinse off your brushes too much with water, but to just wipe off the brushes as much as possible in between color mixtures  instead, and save the water for the final cleanup. If needed, use a water miscible oil painting medium created specifically for these paints rather than water to increase viscosity.

That advice made a world of difference and I found myself painting without fighting with my materials. There was a slight difference in the handling and a few old habits to overcome, but nothing so difficult as to put me off. I would say they did not flow as easily for me as my traditional oils, and the color intensity was a tad weaker, but not by a tremendous amount. On the other hand, they have absolutely no odor and seem like they would be great for travel.

From what I have read so far, the drying time may be a bit longer than what I'm used to. But that should not be an issue for ole' Pokey, here. I do hope they dry well and evenly, without any dull passages or great shifts in color or value. I will report back on this if I notice anything remarkable. I look forward to experimenting more with these paints. I really hope these will be my new go-to paints, and that I can ditch the OMS once and for all!

Delphiniums in the Rain

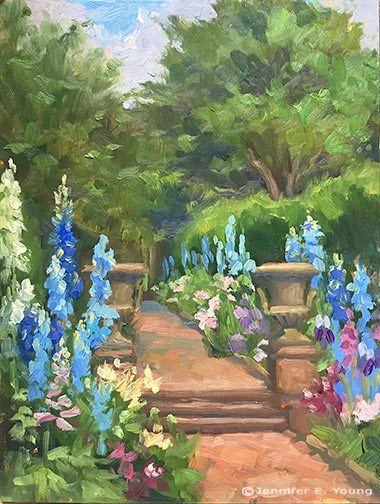
We are in the final push to put our current home on the market this week, so when I woke up this morning looking at the very gray sky and the mountain of work I had to do at home, I almost didn't go out to paint. Luckily my darling husband wouldn't hear of my excuses and practically kicked me out the door. ;-) I had been invited to paint with friends in this beautiful walled garden at a private turn-of-the-century residence tucked back in rolling hills near the banks of the James River. The drive up to the site was stunning in itself. Beautiful bucolic fields were lined with stately mature trees of all kinds. But it wasn't until I entered the garden past the roses and rounded a corner to take in this view that I audibly gasped. I remember my first thought when I saw this beautiful flower lined walkway was that I hoped I had brought the right blues.

Garden plein air painting by Jennifer E Young "Delphiniums at Redesdale" Oil on panel, 12x9" Contact me for purchasing info!
I am told that this garden was designed by Charles Gillette, who is pretty famous around Virginia for his formal garden designs on stately homes such as Agecroft Hall, The Virginia House, and Tuckahoe Plantation. I believe he also had a hand in some of the early designs of the  Lewis Ginter Botanical Gardens.

The rain fell softly off and on during this painting. Every once in a while sunlight and a bit of blue sky peeped through, but luckily not enough to "ruin" my cloudy day painting. At several points things got pretty soggy, and I found myself jostling my brushes, paper towels, and my painting umbrella, which I was using as a rain umbrella for myself, my painting, and my palette. But it all worked out in the end, so I guess that's what matters!

Pear Squared!

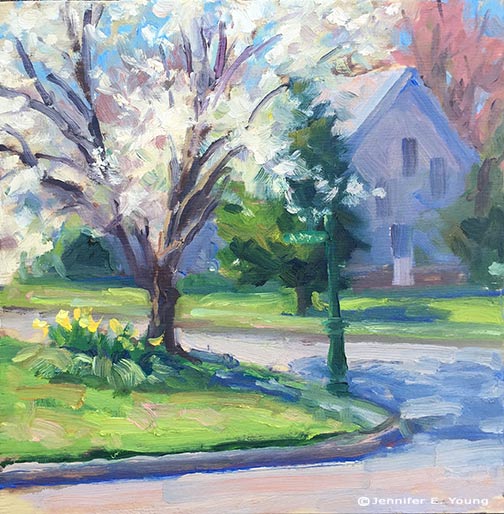
Change is in the air. Nothing seems to change as fast in spring as the appearance of blooms on fruit trees. One minute they are ablaze with blooms, and the next they are leafing out. Here's a little ditty I did yesterday morning right from my own garden. Mine is largely a late spring/summer garden, but my neighbor shares a little early spring splendor from across the street:

Plein air painting in springtime by Jennifer E Young "Pear, Squared" Oil on Panel, 8x8" Contact me to purchase!

It used to be really spectacular, almost cotton-ball like. Then a year or two ago a huge chunk either blew off in a  storm or it got struck by lightening. The top was split in two and I was so sad because I had always meant to paint it at this time of year and something always seemed to pop up to prevent me from getting to it before it leafed out. Any way, thankfully, it survived. And in spite of yet another very windy morning, I managed to get it down.

Spring Break

Yesterday I woke up to sunshine and blue skies. I had a sitter lined up to watch my daughter so it looked like a plein air painting kind of day. I was stoked. Fast forward to 9 a.m.ish at Lewis Ginter Botanical Gardens, and me freezing my tuccus off trying to paint in gale-force winds. My first plein air of the season did not go well. Not only was it looking pretty dark and muddied, but at one point it landed face down in the dirt. In all honesty, it wasn't even worth it to pick off the debris. In fact the mulch may have improved it a little bit! "Well," I thought, "there's always this afternoon". Except there wasn't. My sitter called to cancel which meant I needed to close up shop. I felt pretty dejected. I arrived at preschool ready to assume Mommy duty as per usual. But as luck would have it my daughter and her BFF had conspired to arrange a play date at said BFF's house.

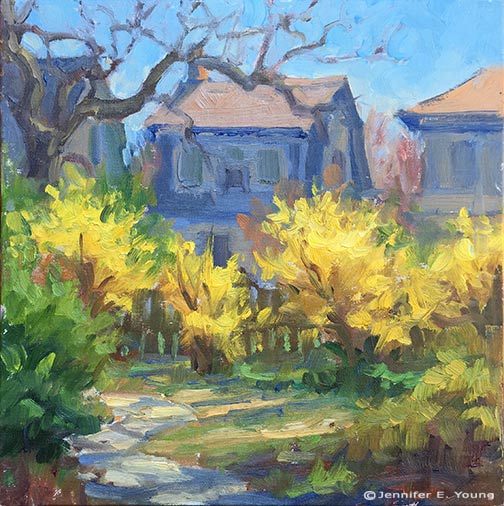
What a lucky break! I'd been granted a 2 hour reprieve, and I was not going to waste it. After dropping my daughter at her friend's house, I peeled away, tires screeching (kidding) and headed for home to get my gear. As I was pulling up to park, these forsythia caught my eye:

Springtime plein air painting by Jennifer E Young "3 o'Clock Glow Oil on panel, 8x8" To purchase, please contact me!
Though the wind whipped up around me and  I was still pretty chilled, the forsythia were beginning to take on a warm glow as the sun prepared itself for its inevitable descent behind the rooftops.

Bellagio Promenade

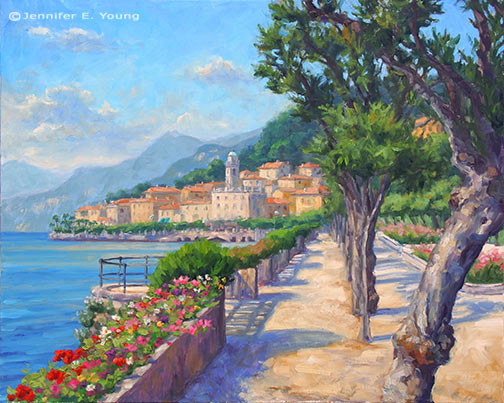
As I mentioned in my last post, I've been working on a large(ish) painting of the Bellagio promenade that leads to the Villa Melzi. It took me a little longer to bring this painting to a conclusion and, because I painted at night, my progress shots were too bad to post. So what I am sharing today is the final piece:

Lake Como Italy landscape painting by Jennifer E Young"Bellagio Promenade" Oil on Linen, 24x30" For more info, click here. To purchase, please contact me!

 Because I had to work on this over a succession of days, I worked pretty lean until the last couple of sessions. In the end though, this bad boy has a lot of paint! Of all of the places I have visited so far in Italy, Lake Como in general, and Bellagio in particular, hovers near the top of my list for achieving that dazzling combination of natural and manmade beauty. The trifecta of pre-Alpine mountains, deep blue waters and classic Italian architecture dripping with flowers is pretty hard to beat.

Primrose and Irises

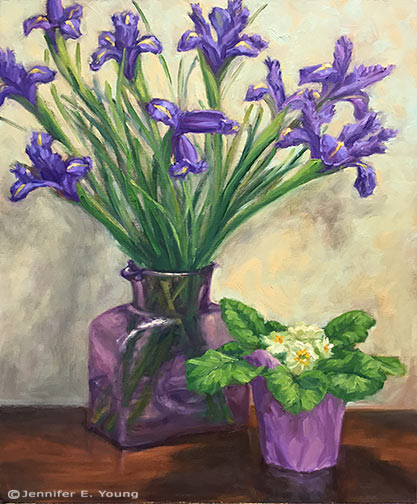
Here's a little celebration of the color violet :-) . I scaled up a bit for this still life. It's still not that big, but given I'm not yet painting these florals at a very fast clip, I felt the difference and it took me a little while to bring it to a conclusion.

Floral Still Life Painting © Jennifer E Young, All Rights Reserved "Primrose and Irises" Oil on Canvas, 20x16" Click here for more info!
I am learning to tackle the cut flowers first. Those babies shift and turn and then have the nerve to shrivel up on you long before you're ready to see them go! The irises are now things of the past, but the potted primrose is still going strong.

Still life shadow box

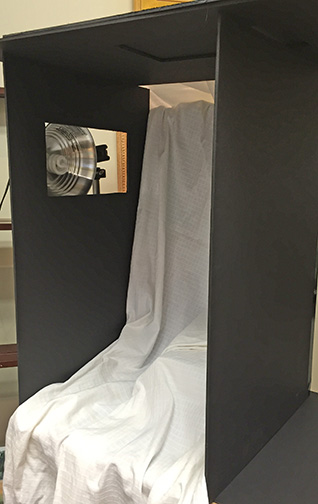
I mentioned in my last post that it's helpful to have some contol over the lighting environment when painting the still life. A simple solution is to create a shadow box. This is not a new idea. If you google "still life shadow box", you can find lots of examples. I looked at a number of them, but given my tendency for being definitively un-handy when it comes to building things, I went for the low tech option as described by Lee A. Brown on his blog A Day Not Wasted. The only difference was that I didn't bother with the plastic corner moulding he mentions. Instead I found one of my favorite "building" supplies, some duct tape, (in black- SCORE!) when I was shopping for the foam core. Made this way, the box isn't indestructible, but it's sturdy enough since I don't really foresee needing to move it around all that much. The other difference in my box is that I made two windows for the light, one on top and one on the left side, which I can cover or uncover with the leftover scrap foam core, depending on which direction I want the light.  Here's what mine looks like:

Shadow box for still life painting

All of this is sitting on this Ikea kitchen cart on wheels, which I found on Craigslist for $10 (SCORE! again.) I'm only 5'4", so at my height, this cart brings my objects about as close to eye level as I can manage given the space I have to work with. I've gathered various boxes (gift boxes, jewelry boxes, etc. to help elevate my objects even further, and to provide some variety in the height I can achieve with various objects.  Here's a slightly different angle, with my last still life setup inside:

shadowbox

A simple large cardboard box, open on one end, and a shop light from Home Depot, is an even lower-tech version that would also work perfectly fine.

Still life...trying again

The last time I attempted a floral still life painting, it all went south. But, since I have been wanting to build a more regular practice of painting and drawing from life, and since it is nothing but brown and gray outside right now in Virginia (not to mention that I don't tolerate the cold too well) I decided not to let a little past  failure hold me back. And as they say, it's in the failures where we have great opportunity to learn and grow. It sounds a bit cliché but it's also actually true, especially if you don't let the failures wig you out. I have to admit, at first I did duke it out with the old psyche a bit, but upon reflection I realized that I really did learn a few lessons from my last effort. For one thing I learned that I didn't really set myself up for success to begin with. I basically walked in, put some flowers in a vase, set them on a table and went to it. How hard could it be? Wellll....

The first problem was that there is actually quite a lot that goes into setting up a nice still life. I figured since it had been a very long time I would keep it simple by focusing on just the flowers and a vase, and no other extraneous objects. Only extraneous objects were all around my prior "setup" (if you could call it that.) The utility sink was in the background, as well as pictures hanging on a wall, art supply bins nearby, etc.  It's not impossible to paint that stuff out, but it is pretty distracting.

Secondly, in my previous attempt, the lighting was completely flat and non directional. That's great for studio lighting in general, but it makes it harder to create form and good color without that definitive light and shadow. I felt like it was kind of akin to painting outside on a gray day.

So the first order of business was to remedy these issues, and create an environment where I would be "set up" for success.  Once I found a solution to my setup issues (which I will share in my next post) I felt like I had more control.

Here's how it went down, in various stages:

Initial design in a wash of cobalt blue, burnt sienna, and chromatic black:

Still life floral painting demo by Jennifer E Young

Blocking in; shadows first, then midtones:

Still life floral painting demo by Jennifer E Young

Fleshing it out:

Still life floral painting demo by Jennifer E Young

Still life floral painting demo by Jennifer E Young

And the final:

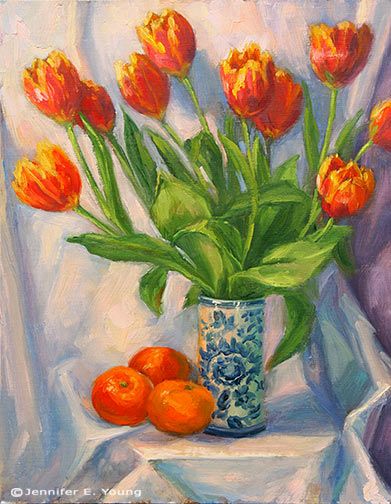
Still life floral painting Tulips and Mandarins by Jennifer E Young"Tulips and Mandarins" Oil on Linen, 14x11" Click here for more info!

French landscape; new and in progress!

It feels like it has been ages since I posted a new work in progress. That is probably because it has been! This kitchen renovation really sidelined me more than I imagined. The new kitchen was in the studio and the old was completely gutted. For weeks. We live in a small house and there was no room at all to store the new stuff, so for a while we could barely walk around without tripping into something or shimmying by someone fast enough to avoid being stapled or drilled. Add to that mix  a couple of family illnesses and a trip or two, and here we are in December already.

French landscape painting in progress by Jennifer E Young

The kitchen still isn't done but at least my studio has been freed from floor-to-ceiling cabinetry, boxes, and debris (not to mention a table saw or two). So today I actually started something new. It feels good! This is a 20x16" and a fairly simple composition. But I wanted to keep it alla prima and fresh and airy, and for my first time back at the easel I wasn't looking to plunge into a large complicated piece. It's not done yet, but I think will be very  soon. When it is I will post it here, of course, and with a much better quality photo.

Holiday sale

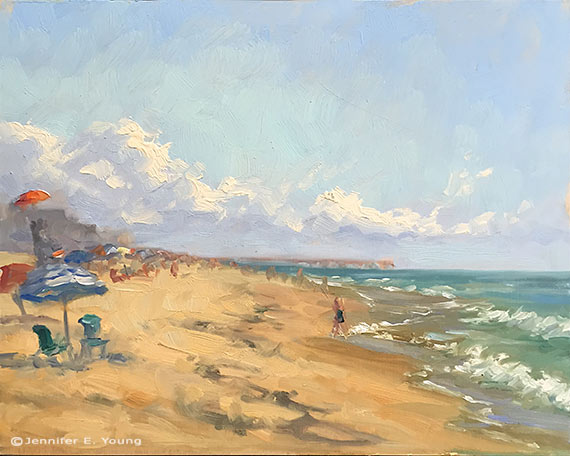
I hope you have a wonderful Thanksgiving holiday, full of family, friends, and fun! I am so thankful to all of my collectors and subscribers to my newsletter and blog! Plein air study of the OBX coastline by Jennifer E Young

Once you have had your fill of Thanksgiving dinner, please consider shopping for a special gift (at a special price) on my "holiday studio sale" page I have created on Etsy. These small original paintings are mostly local plein air studies and oil sketches, and therefore not marketed through retail galleries. Painted in the moment, they are fresh and lively and great gift sizes, either for yourself or someone special. This is a limited time offer, ending December 17th (just in time for Christmas!)

New floral still life (WIP)

I wish I could say that I was as passionate a flower arranger as I am a gardener, but I'm afraid to watch me make the attempt, you'd likely think I was wrestling the blooms into submission rather than celebrating a creative act. Maybe one day I will learn, but at present, my arrangements are pretty tenuous, and they only  look ok as long as you don't look at the back! But I have these great blooms right now in my garden from my massive Limelight Hydrangea, and I have been really wanting to capture them in paint before they are done for the season.

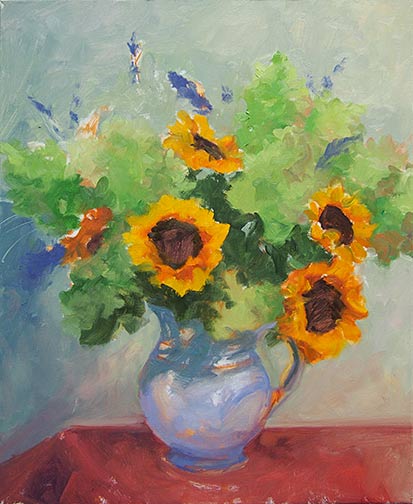
The shrub itself is far larger than I imagined it would be for my space (probably topping out at 8 or 9 feet by now) , but then that is true of just about everything in my garden! The blooms start out a lovely creamy white, and then turn a gorgeous lime green tinged with pink by season's end. Then the other day while shopping I saw these sunflowers lined up like happy little children, so I grabbed a bunch to add to the mix, and an arrangement was born.

It's been a while since I have painted a floral, but I really feel it's so important to regularly practice working from life, and it's been raining an awful lot this last week. So, with fall lurking just around the corner and my flower garden in its final days, I finally felt inspired to give it a go. (Better late than never, I guess!) Here, below,  is the initial block-in on my 24x20" linen canvas.

floral still life painting in progress by Jennifer E. Young

This is about 3 hours' work. I try not to get too detailed yet, but I have my basic pattern down so that I can jump right in when I return to the easel.

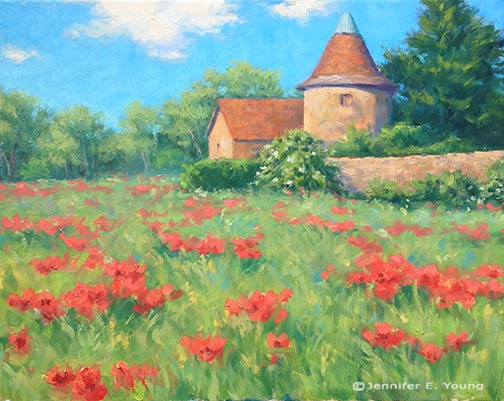
Poppies in a Fallow Field

I posted a progress shot of this painting a while ago, but let it marinate while I took advantage of the good weather to explore some plein air painting. While I haven't closed the season on plein air work, I'm excited to return to the studio, both to start something new and to tie up loose ends.landscape painting south of France by Jennifer E Young

"Poppies in a Fallow Field" Oil on Linen, 16x20" Click here for more info, or contact me to purchase!

In southern France, farmers often sow poppies and other wild flowers in fields that otherwise go fallow. This naturally helps protect the soil from erosion. At other times, poppies self sow and grow wild spontaneously. In either case, their profuse springtime display is pure joy to behold.

Spontaneity

Here's a little plein air I did a couple of weeks ago, before our most recent beach trip. This view is just around the corner from me. It shows another side of the Bellevue neighborhood; a little less neat-as-a-pin, and a little more unkempt and funky, but still with that spontaneous burst of color.

plein air sreet scene by Jennifer Young "Splash of Color" Oil on Multimedia Artboard, 6x8"
The Crape Myrtles are still hanging on.  I hope I can get out a few more times to paint before they fade completely.

There are some benefits to time limits, but I think one of the biggest challenges to working with them is deciding how much of it to commit to R&D (research and development) and how much to commit to production end product. Of course with art, there is plenty of overlap, but I still consider my plein air painting time R&D. That doesn't mean that many aren't "frame worthy", but they are small and spontaneous and not all of them are completed statements. This is good because it allows me a certain freedom in my approach, with less deliberation and concern for the end result and more for the process and just really studying light effects, color temperature, values, and textures.

However, studio paintings are still paramount to my work, and at some point I need to get  some larger pieces done,  no matter how much the great outdoors may call me.  My goal with all of this is to see how well I can carry over the spontaneity and that feeling of the light from my field work into a more complete statement with my larger studio pieces. In terms of subject matter, they may not always seem to relate all that much, but for me the two disciplines are very interdependent.

Shadows of Frayssinet (W.I.P. complete)

I've been doing a little plein air painting lately, some of which I will share here soon. But lately it seems like I either have time to paint or post, and I guess I have chosen painting. (Sorry blog!) I do have a completed studio painting to share today though, the beginnings of which I posted right before preschool spring break!

French village painting by Jennifer E. Young"Shadows of Frayssinet" Oil on linen, 20x16" SOLD

This is in the lovely little village of Frayssinet in the oh so lovely Lot Valley of France. I  enjoyed this so much that I plan to do a companion piece to this one of a different cottage from the same town, in the same size and orientation.

Summer Blooms, Ansouis (final)

I'm happy to report this post will wrap up the Ansouis painting I have written about in my last couple of entries. In the shot below, I have fleshed out the rooftops and the distant mountain. I am keeping the background fairly plain because there is already a lot going on with the architecture and plants.

French village painting in progress by Jennifer E. Young

The people of Ansouis take loving care of their little village. Not only are there potted flowers gracing nearly every window and doorway, but the public spaces also have beautiful plantings as well. This square in the village had a lovely combination of lavender, yellow roses, and deep pink blooms. I lay the flowers in last after the painting has set up a bit. This allows me to overlap the background buildings and helps to push them further back into the background.

Ansouis France village painting by Jennifer E. Young Summer Blooms, Ansouis Oil on linen, 20x24" SOLD

There, that about wraps it up! I'm glad I was able to finish this up before Christmas week, because the holiday schedule is heating up and I'm not sure when I will be back in the studio again before the new year. In light of that, let me seize this opportunity to wish you all a very Merry Christmas and a joyous holiday season!

Update on the Ansouis painting in progress

Now that we have some real Christmas deadlines looming, I've decided to give the self-hosted auctions a rest for a while. Thanks so much to those who bid and followed my auctions! It's been an interesting little experiment that I might revisit in 2014. But it was a lot more time consuming than I imagined, at a period in my life when it is a challenge just to maintain a normal studio schedule. Meanwhile, the painting of Ansouis is still on the easel (case in point!) Here are the latest progress shots:

Ansouis French village painting in progress by Jennifer E Young

Ansouis French village painting in progress by Jennifer E Young

 Ansouis French village painting in progress by Jennifer E Young So now I have the whole canvas covered. I started in on some of the details sooner than I would have liked, but there were a few breaks in the continuity of my painting sessions that compelled me to tackle certain areas while they were still wet. Over the next session or two I'll be finalizing the background mountains and fleshing out the flowerbeds. I'm going to do my best to finish this up in advance of Christmas. School's out for a couple of weeks for Christmas break so my studio time is about to get a lot more dicey.

Lilacs and Forsythia

This is the first time I've posted two auctions in the same week. But while this painting would be great on its own, it's also a nice companion to my other still life auction, "Daisies in a Blue Jar". This auction will start at 9 a.m. this morning. Read on for the details!

Floral still life of lilacs and forsythia by Jennifer E. Young

"Lilacs and Forsythia" Oil on canvas (gallery wrapped) 8x8" Place your bid in the auction widget on the right sidebar of this page! Congratulations to Barbara T. for winning this auction!

Even though it's the season of Christmas, springtime doesn't feel so far away with this delicate painting of cut lilacs and forsythia. This original oil painting measures 8x8" and is painted on a gallery wrapped canvas with 1 1/2" deep edges. The painted edges provide a finished look, so no extra framing is needed! This gallery-wrapped painting offers a number of great opportunities for display. It looks equally great perched on a mantel or bookshelf as it does hung traditionally on a wall.

This painting retails for $450.00, so this is a wonderful opportunity to purchase it at a fabulous price (and still in time for Christmas!) Signed by the artist, lower left.

Here's how the auction works:

  • All auctioned items are offered unframed.
  • The opening bid for this painting is just $100 (a fraction of my retail price).
  • Bids increment by $25
  • Highest bidder at the auction’s end wins the painting.
  • When the auction has ended, I will send the winning bidder a Paypal invoice.
  • Virginia residents are subject to a 5.3% sales tax.
  • I ship via U.S. mail within 3 days or less of receiving cleared payment.
  • Free shipping in the continental USA!
  • Visit my auctions page for more details