Lake Como Painting Progression (continued)

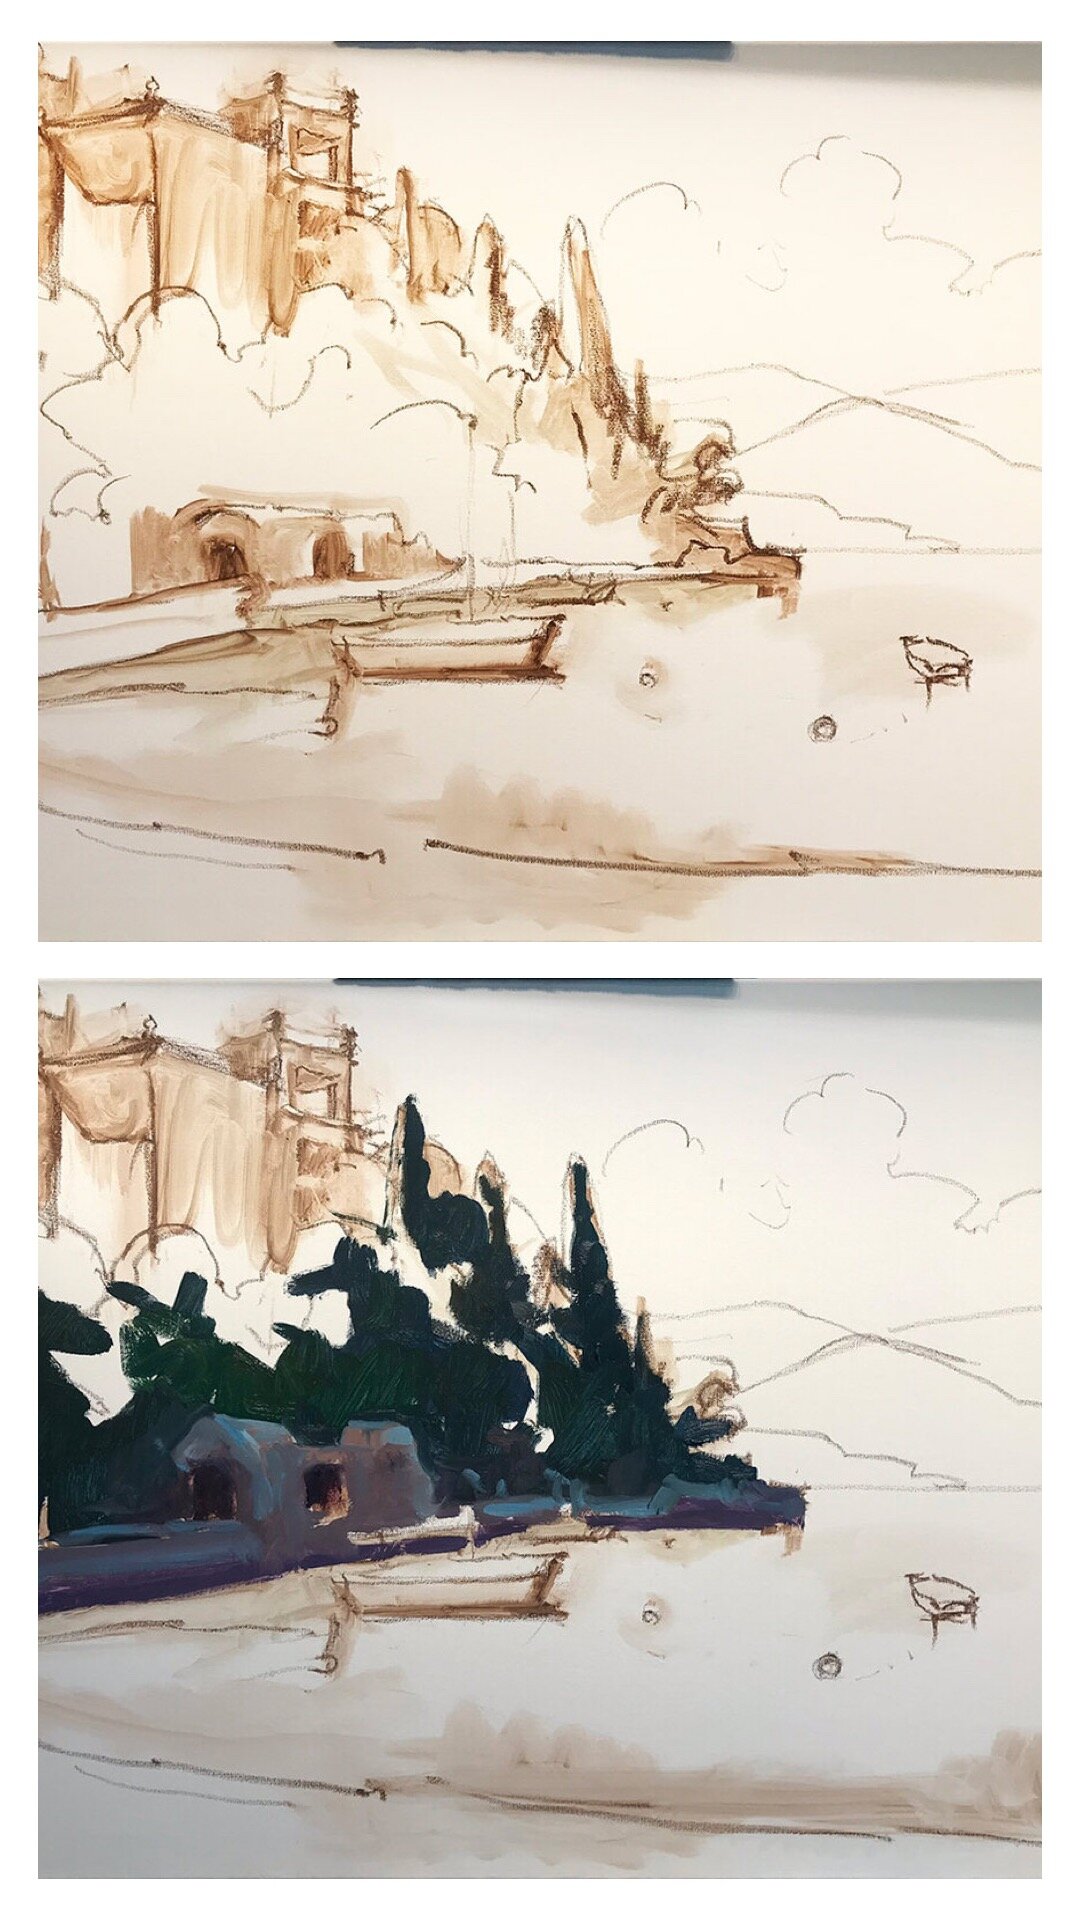
Well the time has really gotten away from me this week, as we are in the home stretch of my daughter’s “learn from home” work for her last weeks of fourth grade. But I HAVE been making progress on my painting of Varenna, the start of which I shared in my prior post.

First things first… I thought before going any further I would share a little about the colors currently on my palette, and what I’ve been using to work on this piece.

palette2.jpg

I will start by saying that this is a pretty big palette of colors for me, and definitely larger than what I use for my field work. But because I have such limited studio time, it helps to have a few more “convenience colors” to work with so I don’t spend so much time mixing. Plus look at those yummy colors. Sometimes it is just plain fun to indulge in them, as long as I don’t have to carry them around in my backpack! The paints listed with an asterisk* by their name are the kinds of colors I nearly always use. This is basically a double primary palette with the addition of an earth (brown pink) and a “black” (Payne’s Gray, which is really almost a dark blue).

I pretty much always lay my basic palette out the same way in a clockwise fashion. So for instance, starting with my earth colors in the lower left, I move up to white, which is always in my upper left, followed by colors from warm to cool, generally speaking. This palette has varied over time with a few colors added, or removed, or others substituted from time to time when I want to experiment. For instance, my two reds used to be Cadmium Red Light and Alizarin Crimson, but I switched to a cooler Napthol Red for my “warm” because when tinted it makes a cleaner, less orangey pink. I will use Quniacridone Violet in a similar manner to my former Alizarin Crimson for nice dark purples or browns, to modify other colors.

If you are new to painting I would recommend starting out with a double primary palette (a warm and cool of each primary color, yellow, red, and blue) plus white, and then slowly adding new colors over time as you get a good handle of what your primaries can mix. You might be surprised at what even a single primary palette can do.

Okay, enough palette talk for now. Let’s recap;

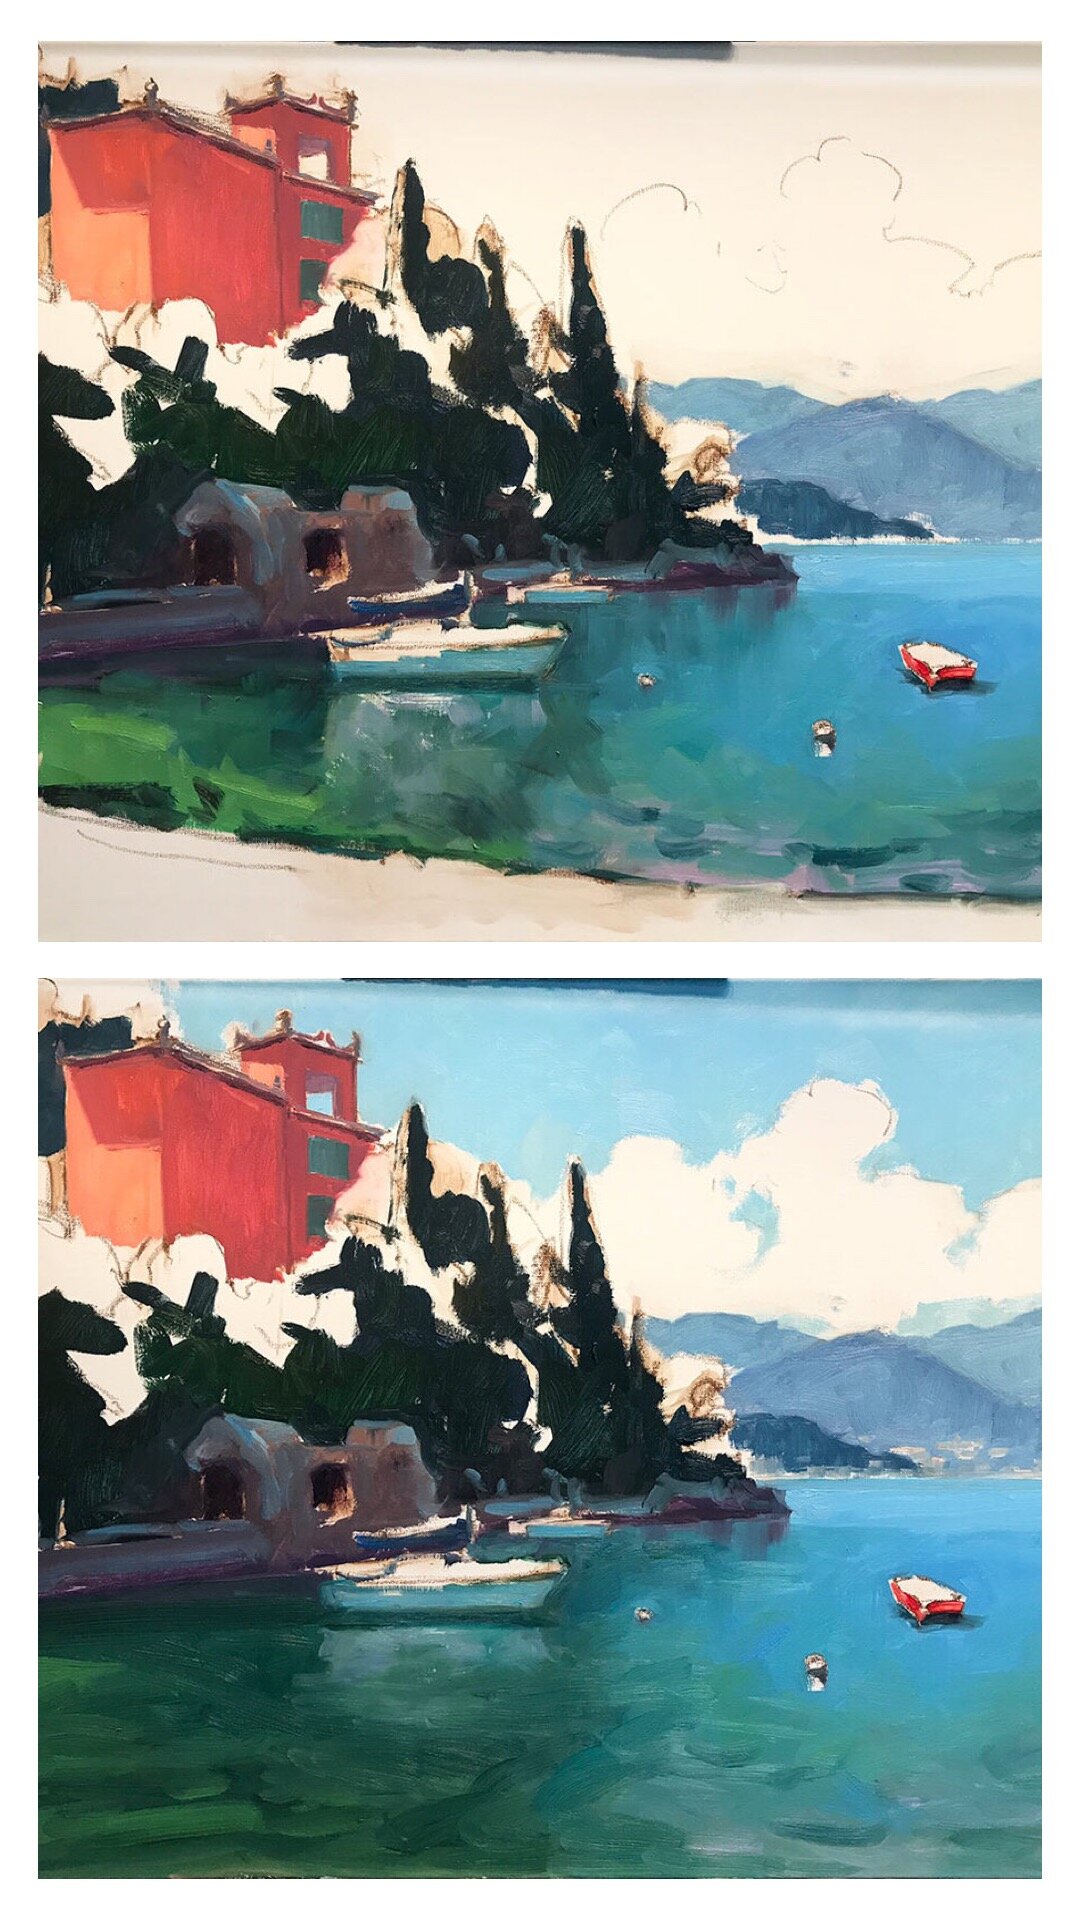
It’s time to address the rest of that white canvas by adding color to the lit side of the trees

varenna_demo_jenniferyoung

I also start addressing a few of the details of the foreground including boats and walkway to the town of Varenna.

varenna_demo_jenniferyoung

And finally (with a big caveat that this color is off because I was working on the painting at night and photographed it without the benefit of daylight) I start to address the masts, water, and clouds.

varenna8.jpg

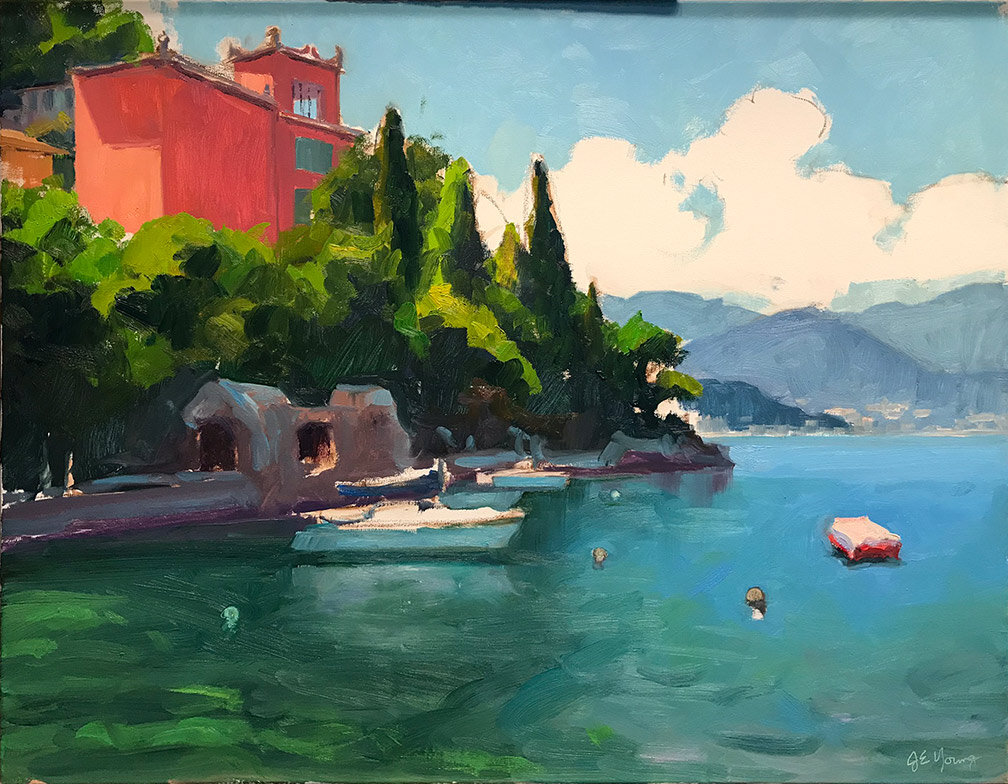
At this point I am going to sit with the painting for a day or two and may “tweak” it here and there, but I am close. I will post the finished piece, (photographed in better lighting) when I do. ***UPDATE*** See the final painting here.

Two more from "Public Gardens Week" at Lewis Ginter

Today I am continuing my last post’s theme by sharing a bit about the two additional paintings I created during the “National Public Gardens Week” event at Lewis Ginter Botanical Gardens. I will be submitting all three of the pieces I created during that week to a jury for an exhibit that will be held throughout the summer at Lewis Ginter. If I should get a piece (or pieces) accepted into the show, I will post an update here and also add it to my calendar. Here’s hoping!

This first piece was done in the Rose Garden, which I was so happy to have finally been able to capture at its peak, even while under the full onslaught of the Virginia sun.

“Rose Regalia, Lewis Ginter Botanical Gardens”, Oil on linen, 12x16” ©Jennifer E Young

“Rose Regalia, Lewis Ginter Botanical Gardens”, Oil on linen, 12x16” ©Jennifer E Young

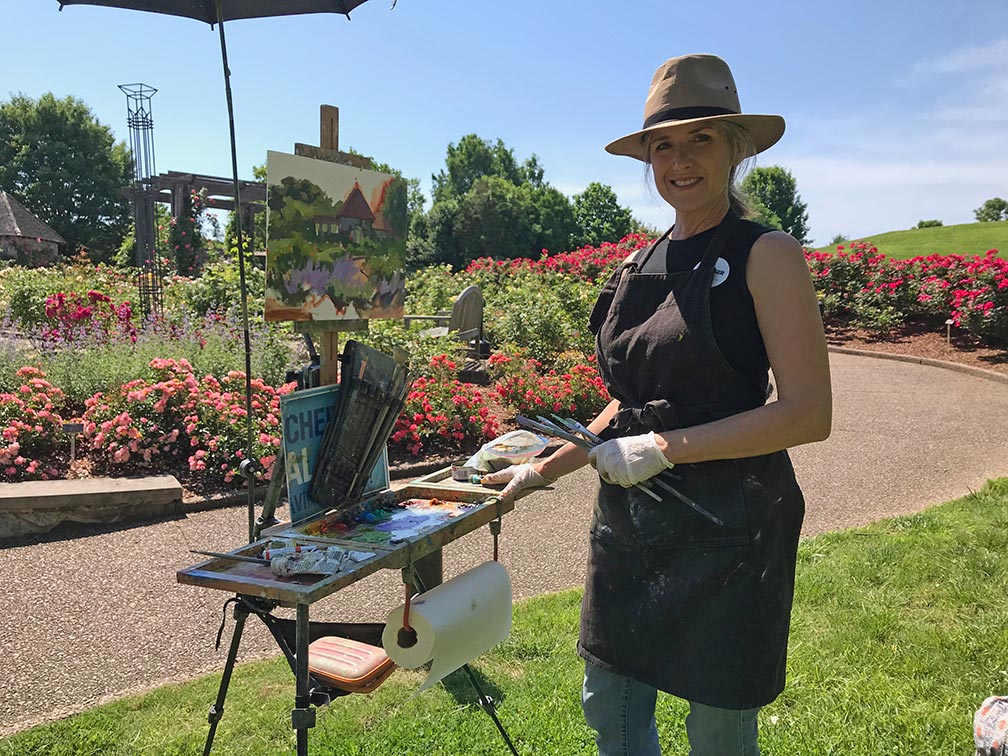
I own two painting umbrellas, and whenever possible, I do my level best to avoid having to set them up. Not only does it interrupt my process by having to stop and attach it and adjust the angle, it also can easily take on the “Mary Poppins” effect, lifting my entire setup with one inopportune gust of wind. But at this location and at this time of day (and with this skin of mine) an umbrella was an absolute must. Not only does it shade my palette and my painting to eliminate the blinding glare, but it (kind of) shades me too. Here I am with my umbrella set up, working out my composition about midway through the process. I use a stone bag on my tripod to help weigh down the base of my setup. In this case, I’m using my pouch full of paints as the “stones.”

The next painting was done on another blazing hot morning down at the lily pond near the Children’s Garden. I thought I was being quite smart by tucking myself back in a shady corner on a dead-end path pond-side. Sadly that lovely shade burned away in less than an hour, and again I had to extract the dreaded umbrella apparatus.

“The Magical Treehouse, Lewis Ginter Botanical Gardens”, Oil on linen 12x12” ©Jennifer E Young

“The Magical Treehouse, Lewis Ginter Botanical Gardens”, Oil on linen 12x12” ©Jennifer E Young

Though I definitely struggled with the heat of the morning, I ultimately got lost in the joy of painting this piece. It holds so many special memories for me, having ascended the ramp that leads to the tree house many times with my young daughter. I attempted to paint this structure once before many years ago when I was newer to plein air painting and before I had a child. It ended up looking like an out of place alien space ship devoid of all charm, and I was scared away from painting it until now. I’m not sure if it was the additional experience as a painter or as a mother that helped me so much more this time. Maybe it was a little bit of both. In any case, this might be my favorite of the bunch.

Time struggles, plein air, and new calendar of events

This week has been a little crazy; two openings and a plein air event for me, theater rehearsals and school and sports for my daughter, and all of the regular stuff of life in between. But some version of crazy seems to be the norm for my schedule every week, and I am not alone.

While I was painting this week at Lewis Ginter Botanical Garden (more on that in a minute) I ran into an artist friend and we started talking about how disorganized we can sometimes feel and how guilty we feel about not being better at marketing to social media, to our newsletters, and yes, to our blogs. When time is crunched, the choice of whether to do any of the above or to paint always seems to result in painting as the clear winner.

It’s a frustration that I know a lot of other artists share, many of whom, like me, aren’t always masters of time management or organization. “I need a calendar of events on my website,” I said to my friend, “a quick and simple way for people to check in and see my upcoming shows and events. Maybe it would help me stay more organized too.” When I got home that afternoon, I checked out my site and lo and behold it does have that functionality. So viola! I now have a calendar!😃

If you check out the aforementioned calendar you can see that I have been spending the week painting at the botanical gardens as part of a promotion for National Public Gardens Week. Local artists who applied to paint during this week will submit their completed works for a chance to be juried in to an exhibit at Lewis Ginter that opens June 22nd.

Work in progress, 12x16”, painted during National Public Garden Week at Lewis Ginter Botanical Gardens

Work in progress, 12x16”, painted during National Public Garden Week at Lewis Ginter Botanical Gardens

I really like these kind of events because even though I regularly paint outside on my own, they get me out and focused and inspired. I enjoy seeing what other artists are doing and collecting new ideas on various artists setups and tools of the trade. It’s a very different vibe from the more formal events that are organized around competition. I have some friends who thrive on competition and use it as a means to drive themselves onward to bigger heights. For myself, it’s a little more stressful. I do the competitions from time to time and haven’t yet regretted it, but I am not that competitive by nature. So the more relaxed festivals that are really just a celebration of art and plein air painting are truly my jam.

Escape to Provence! A Step by Step Demo

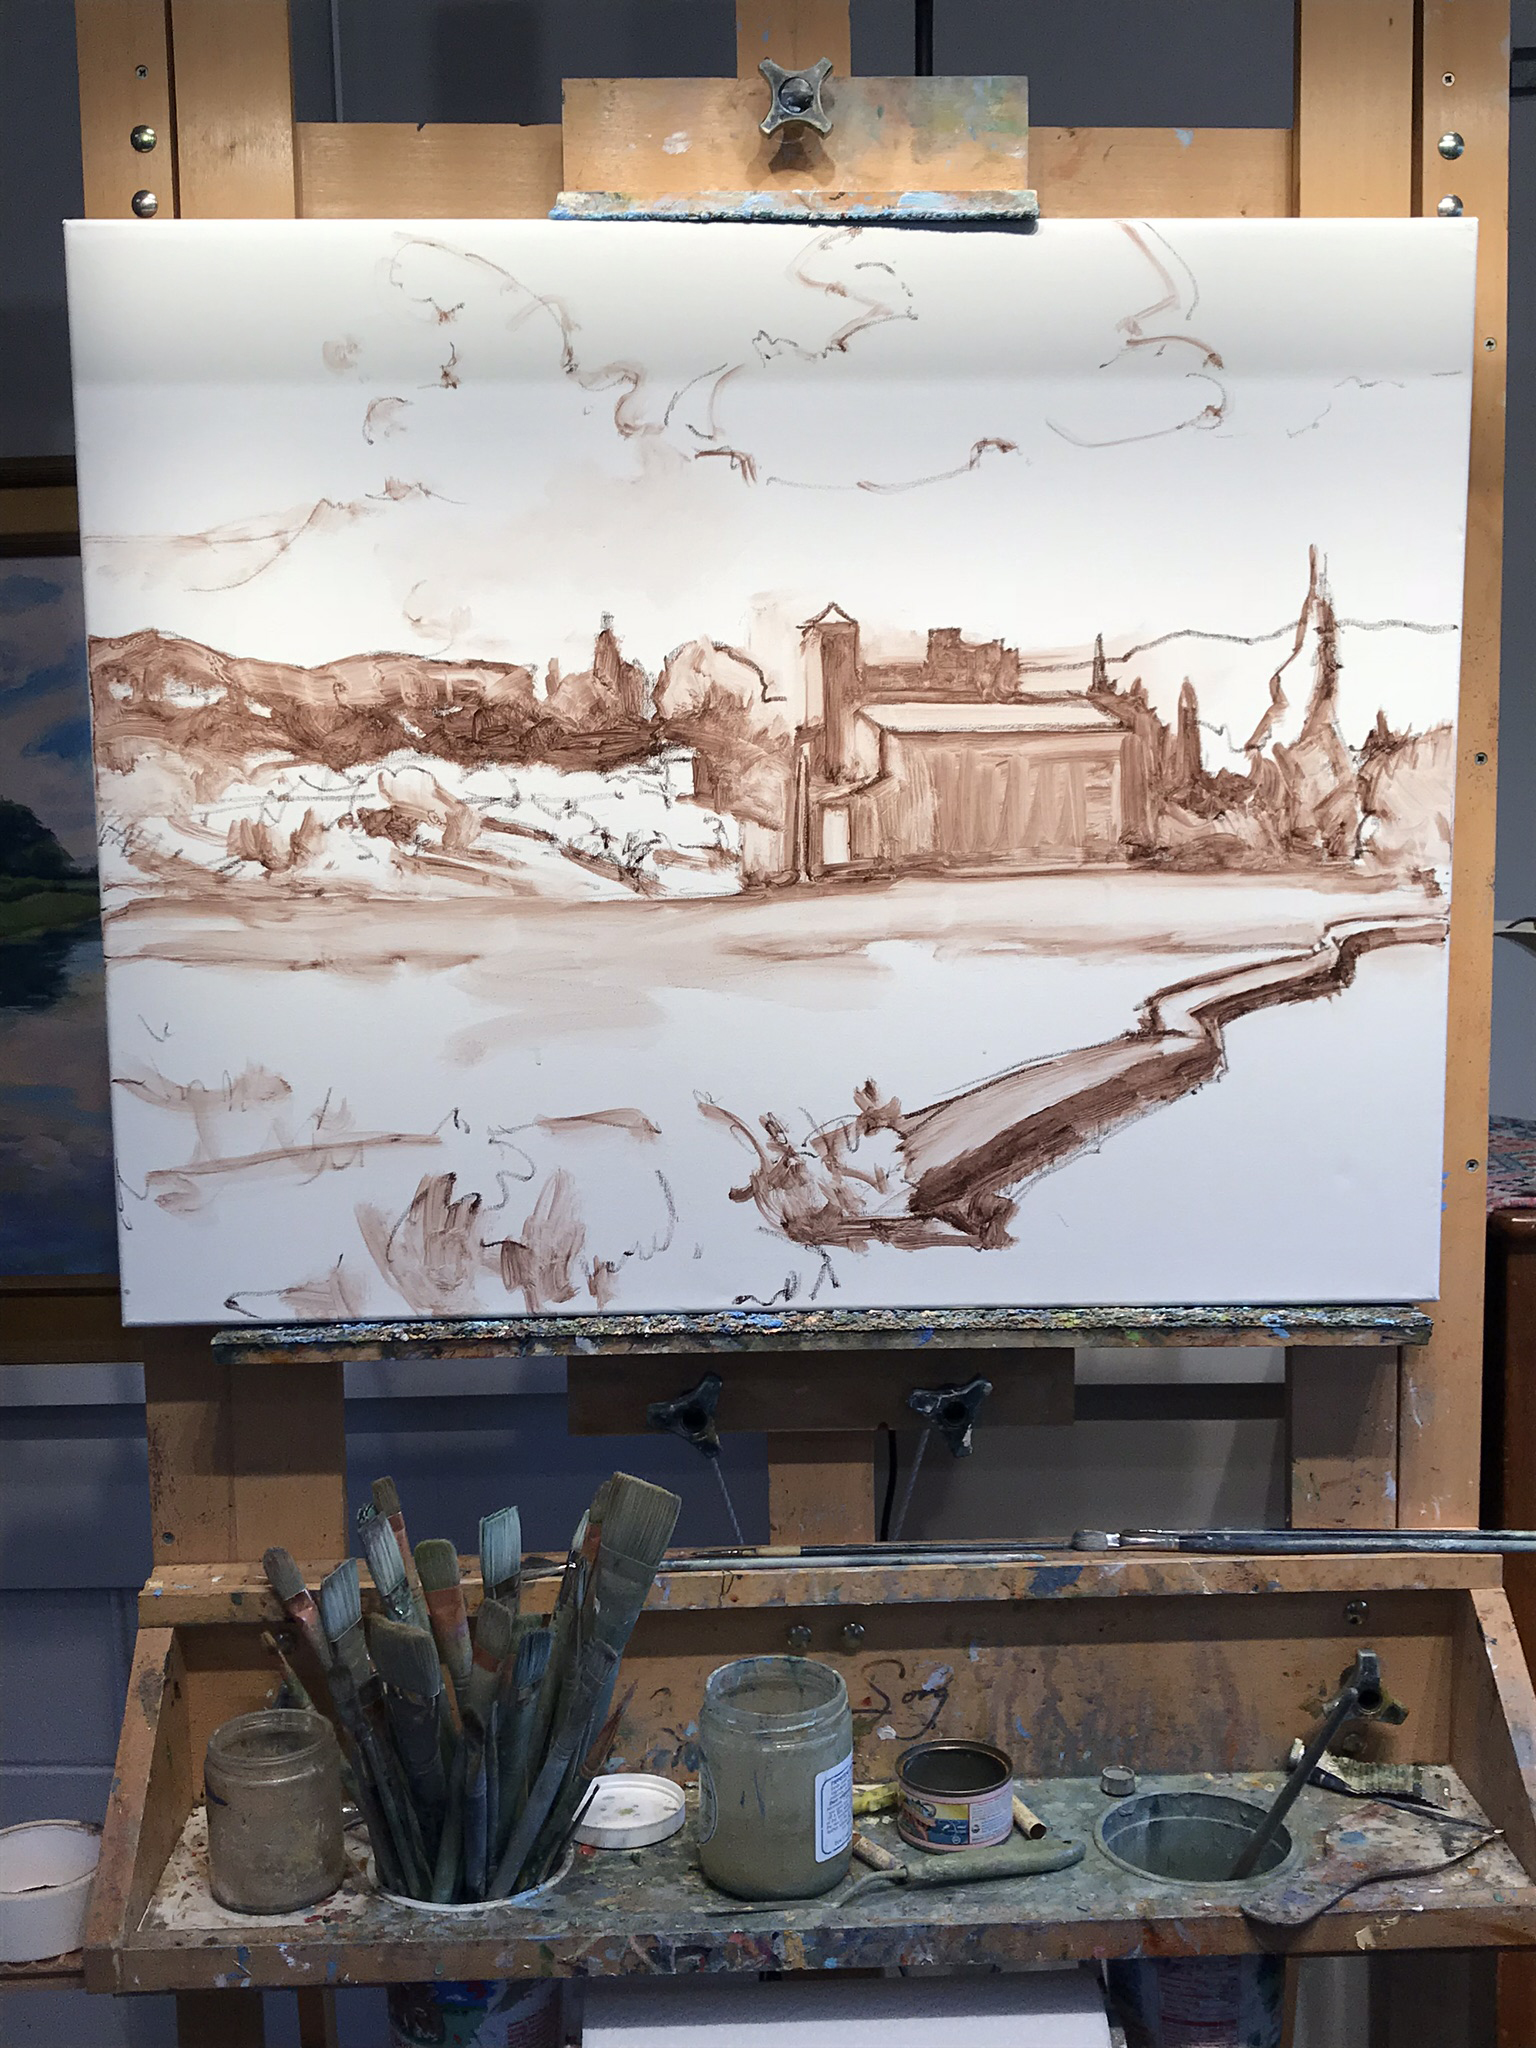
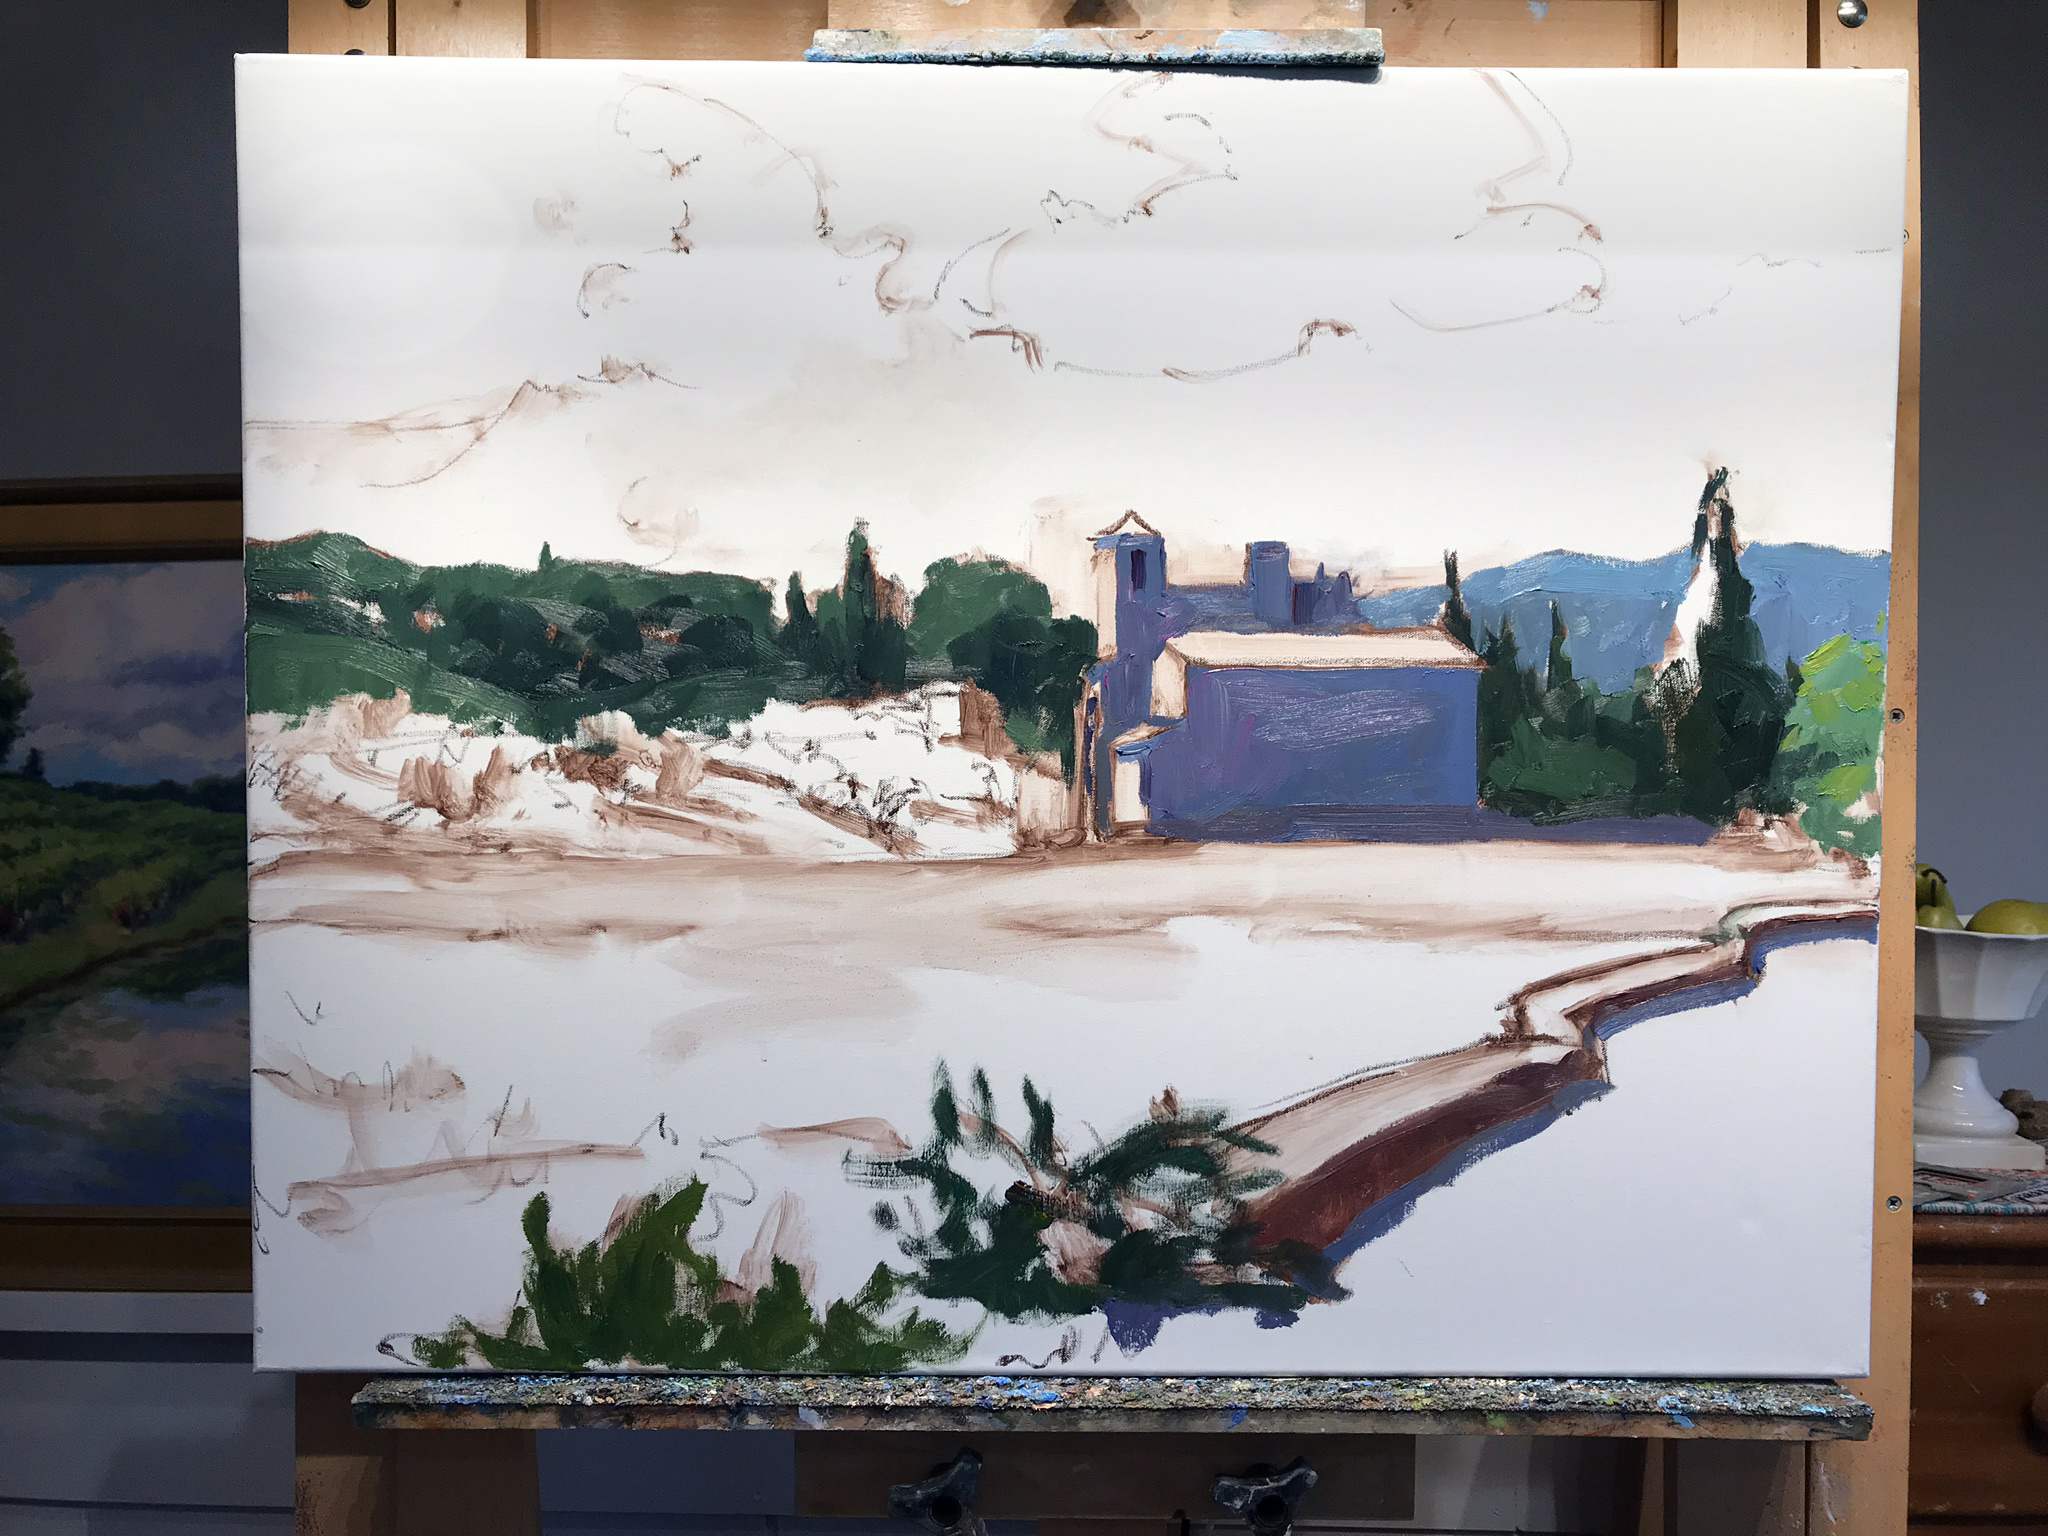
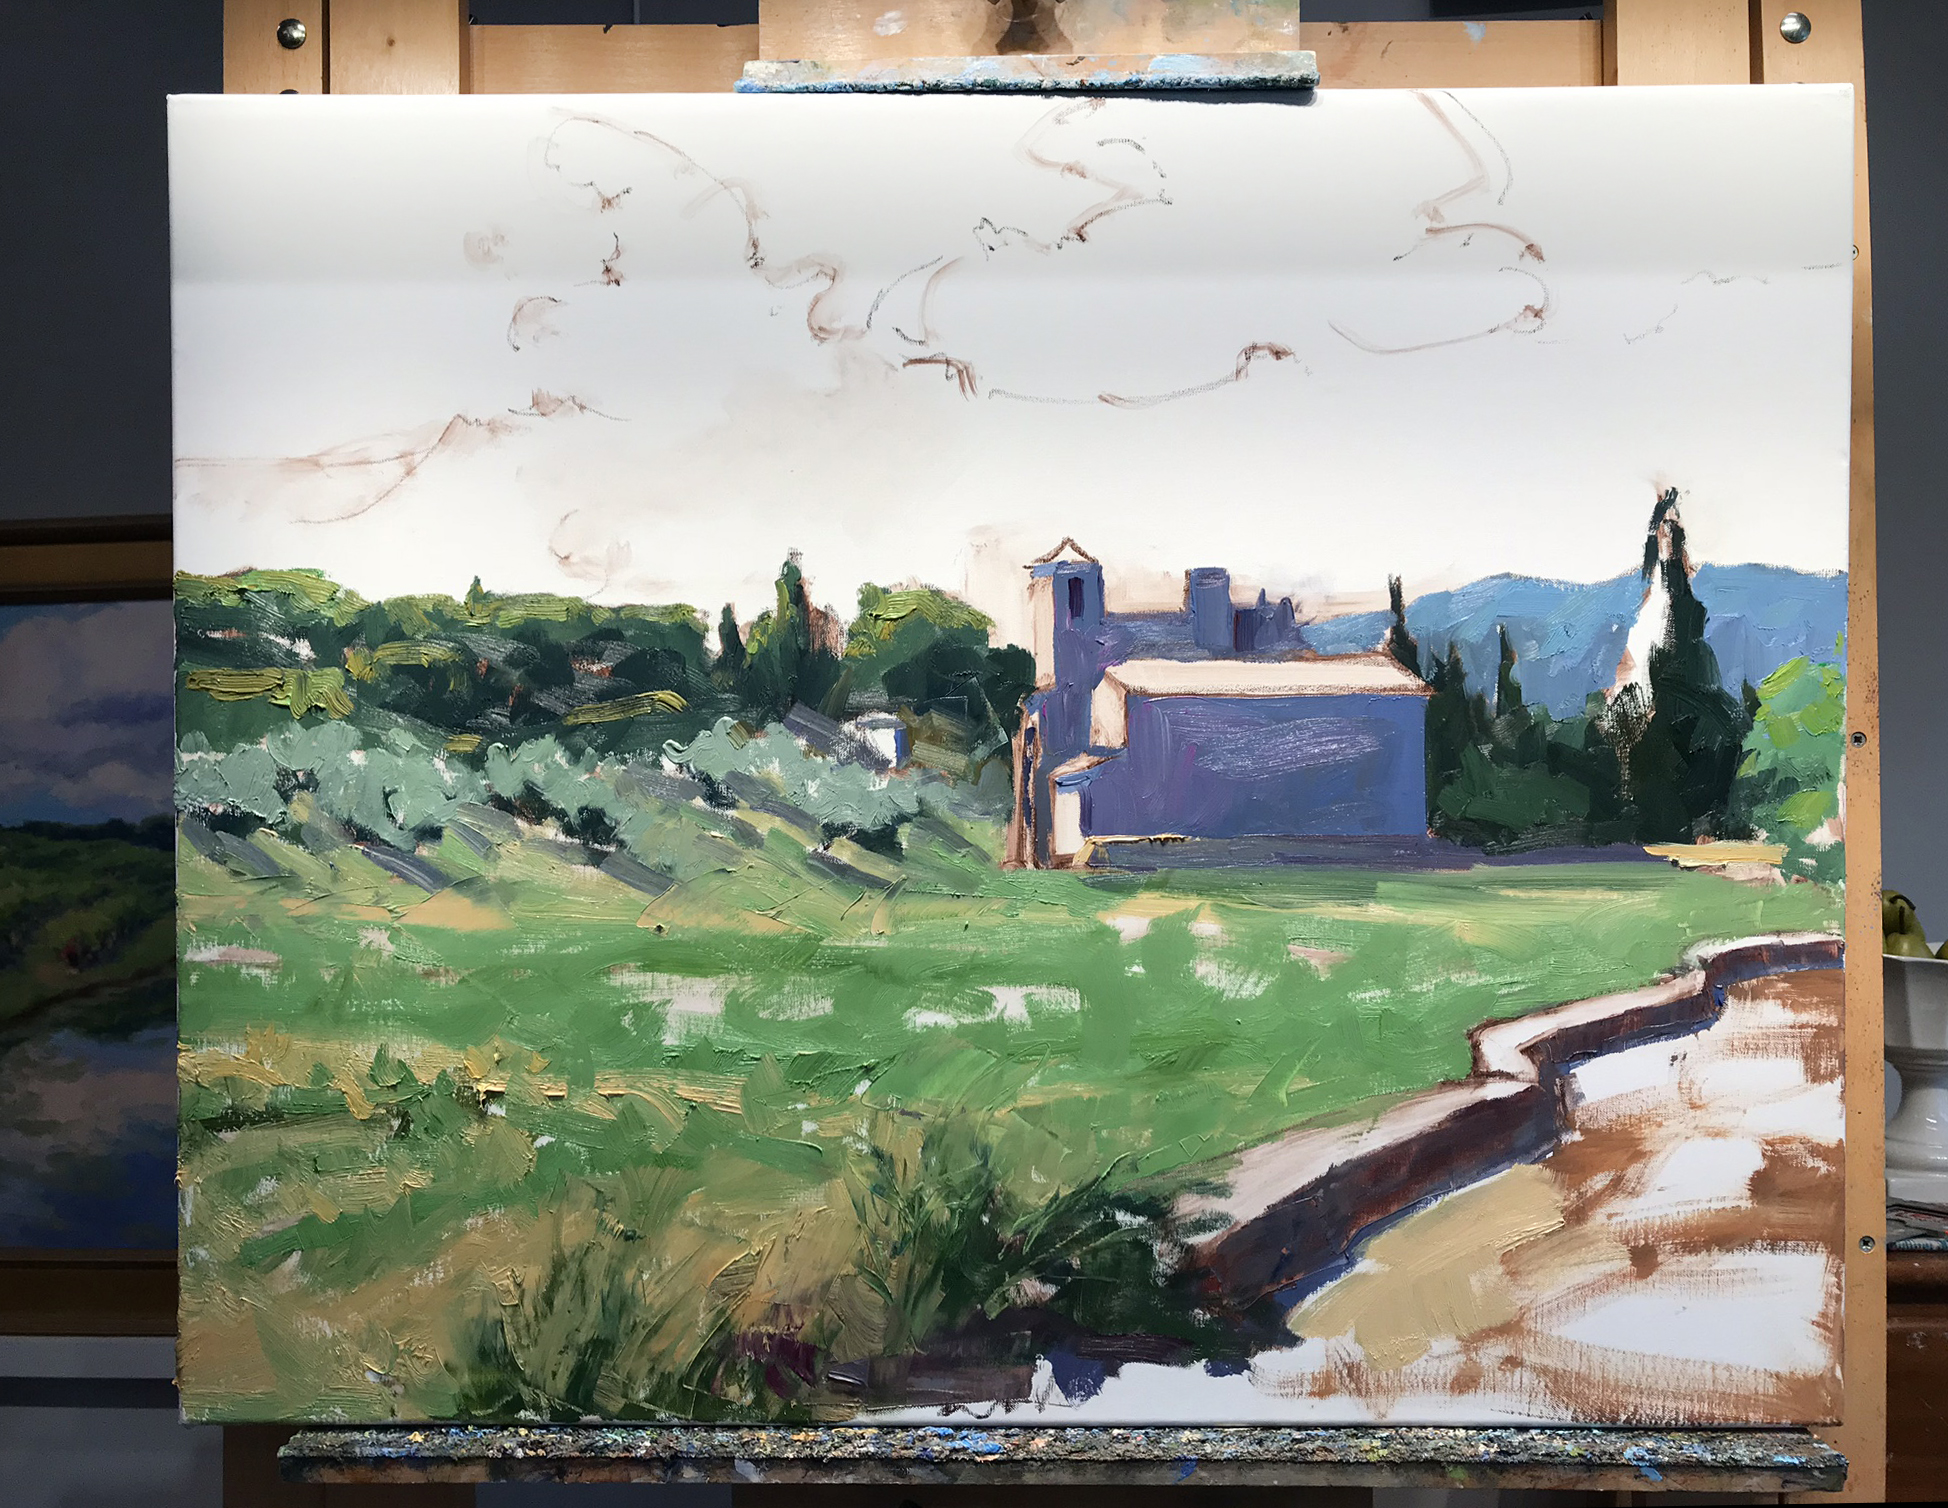
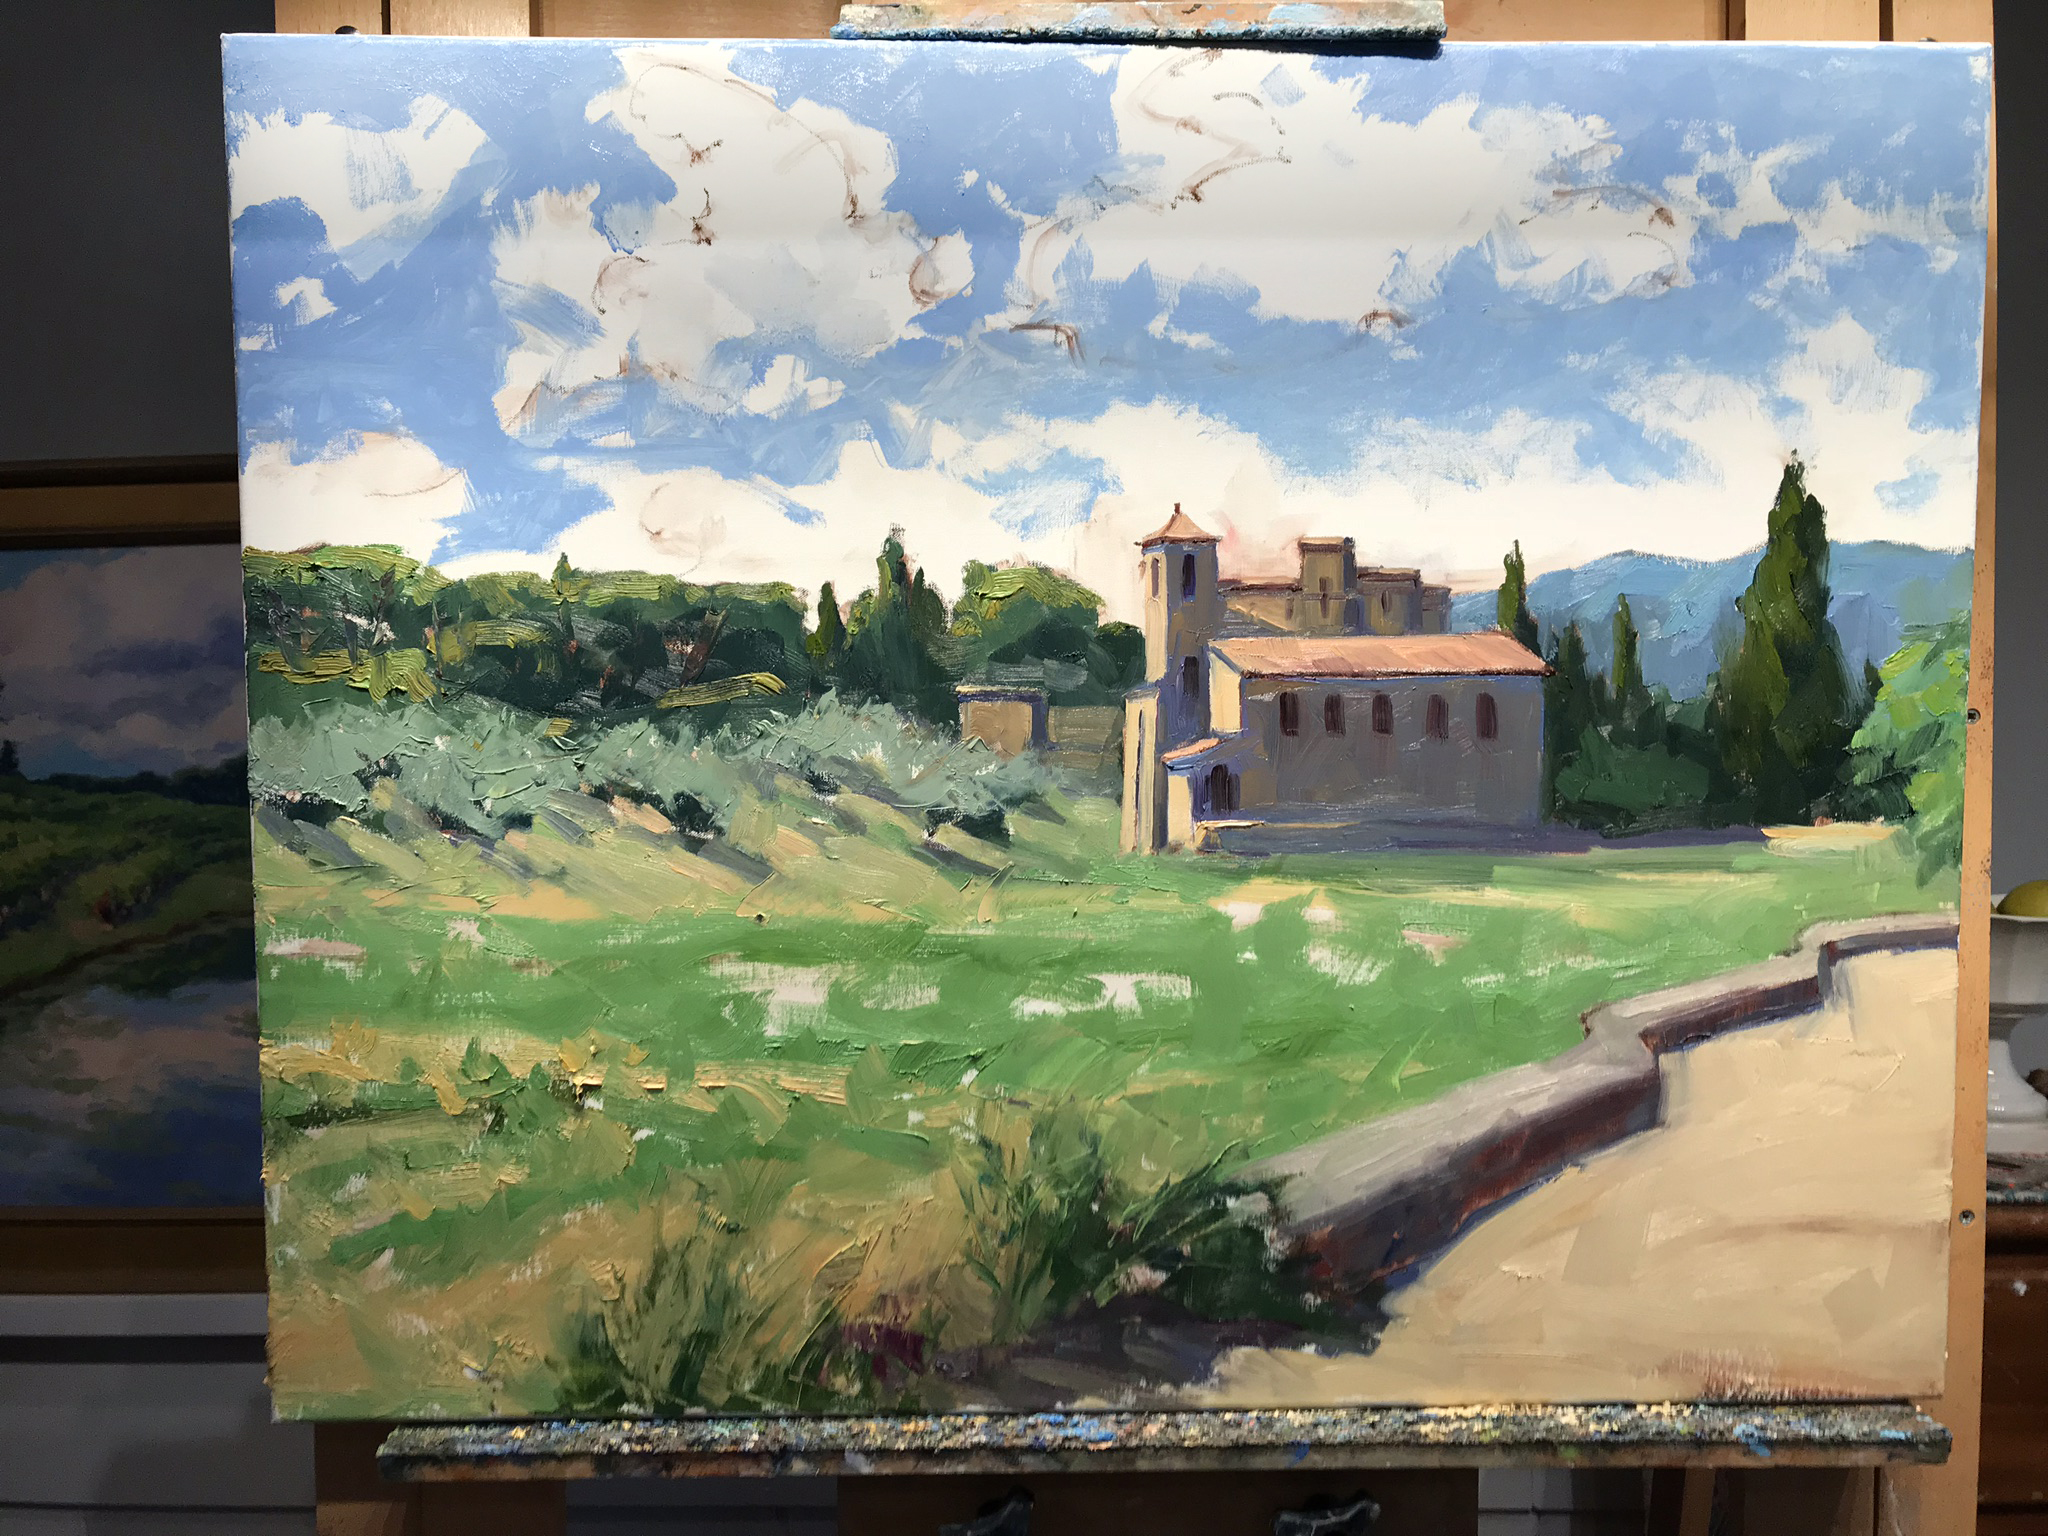
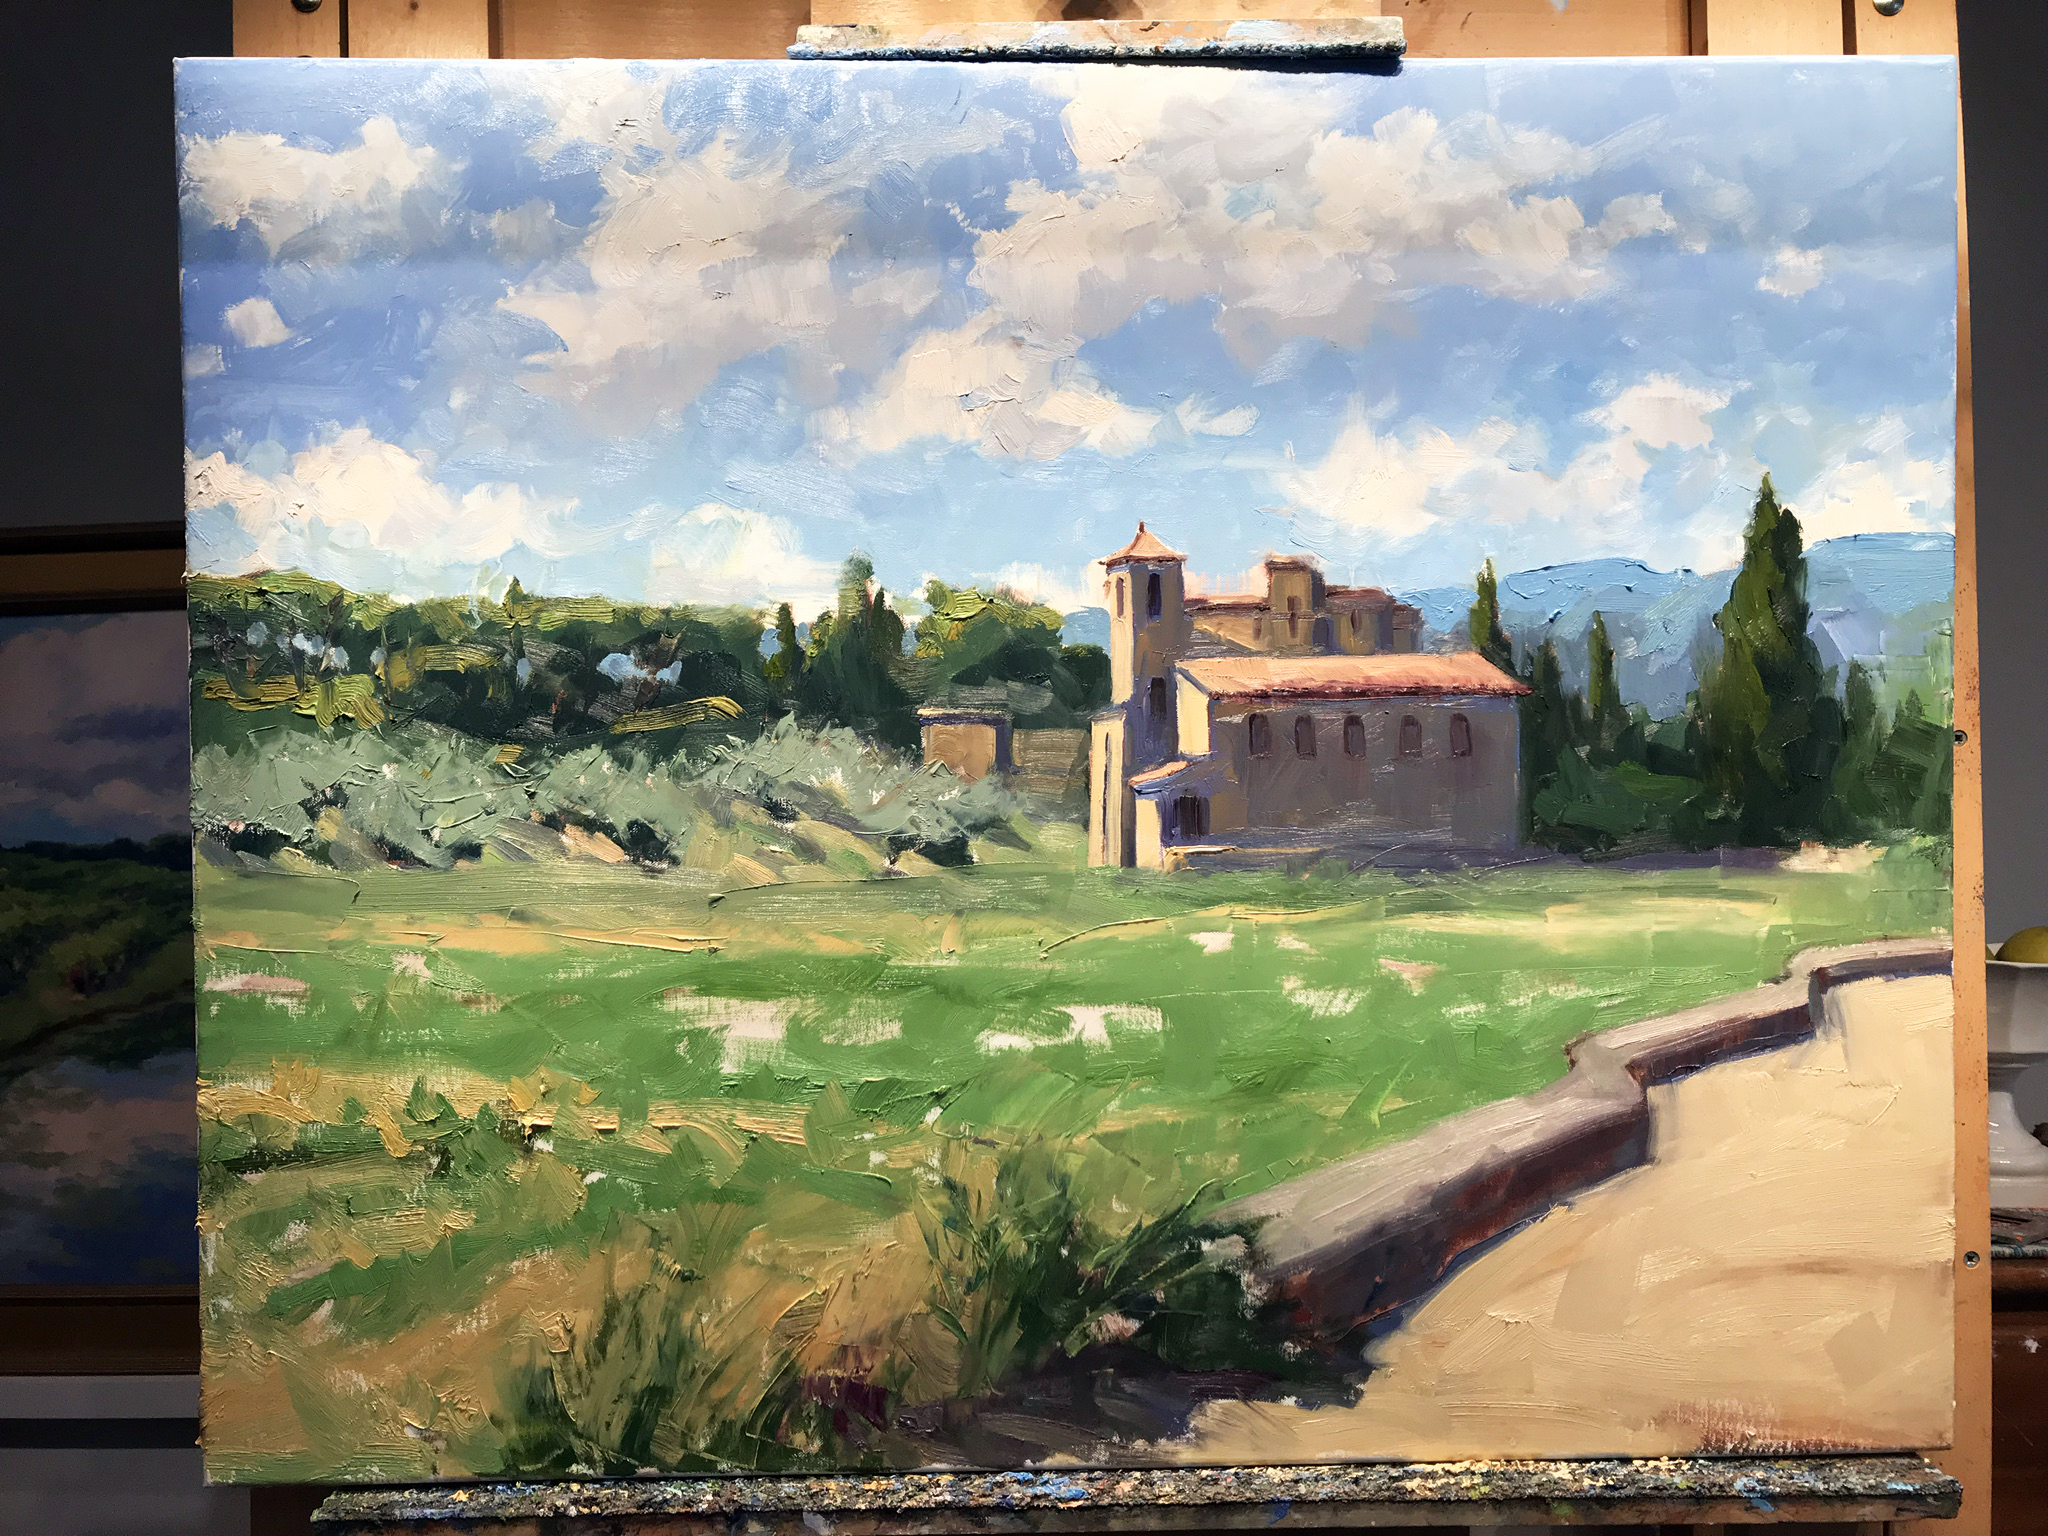
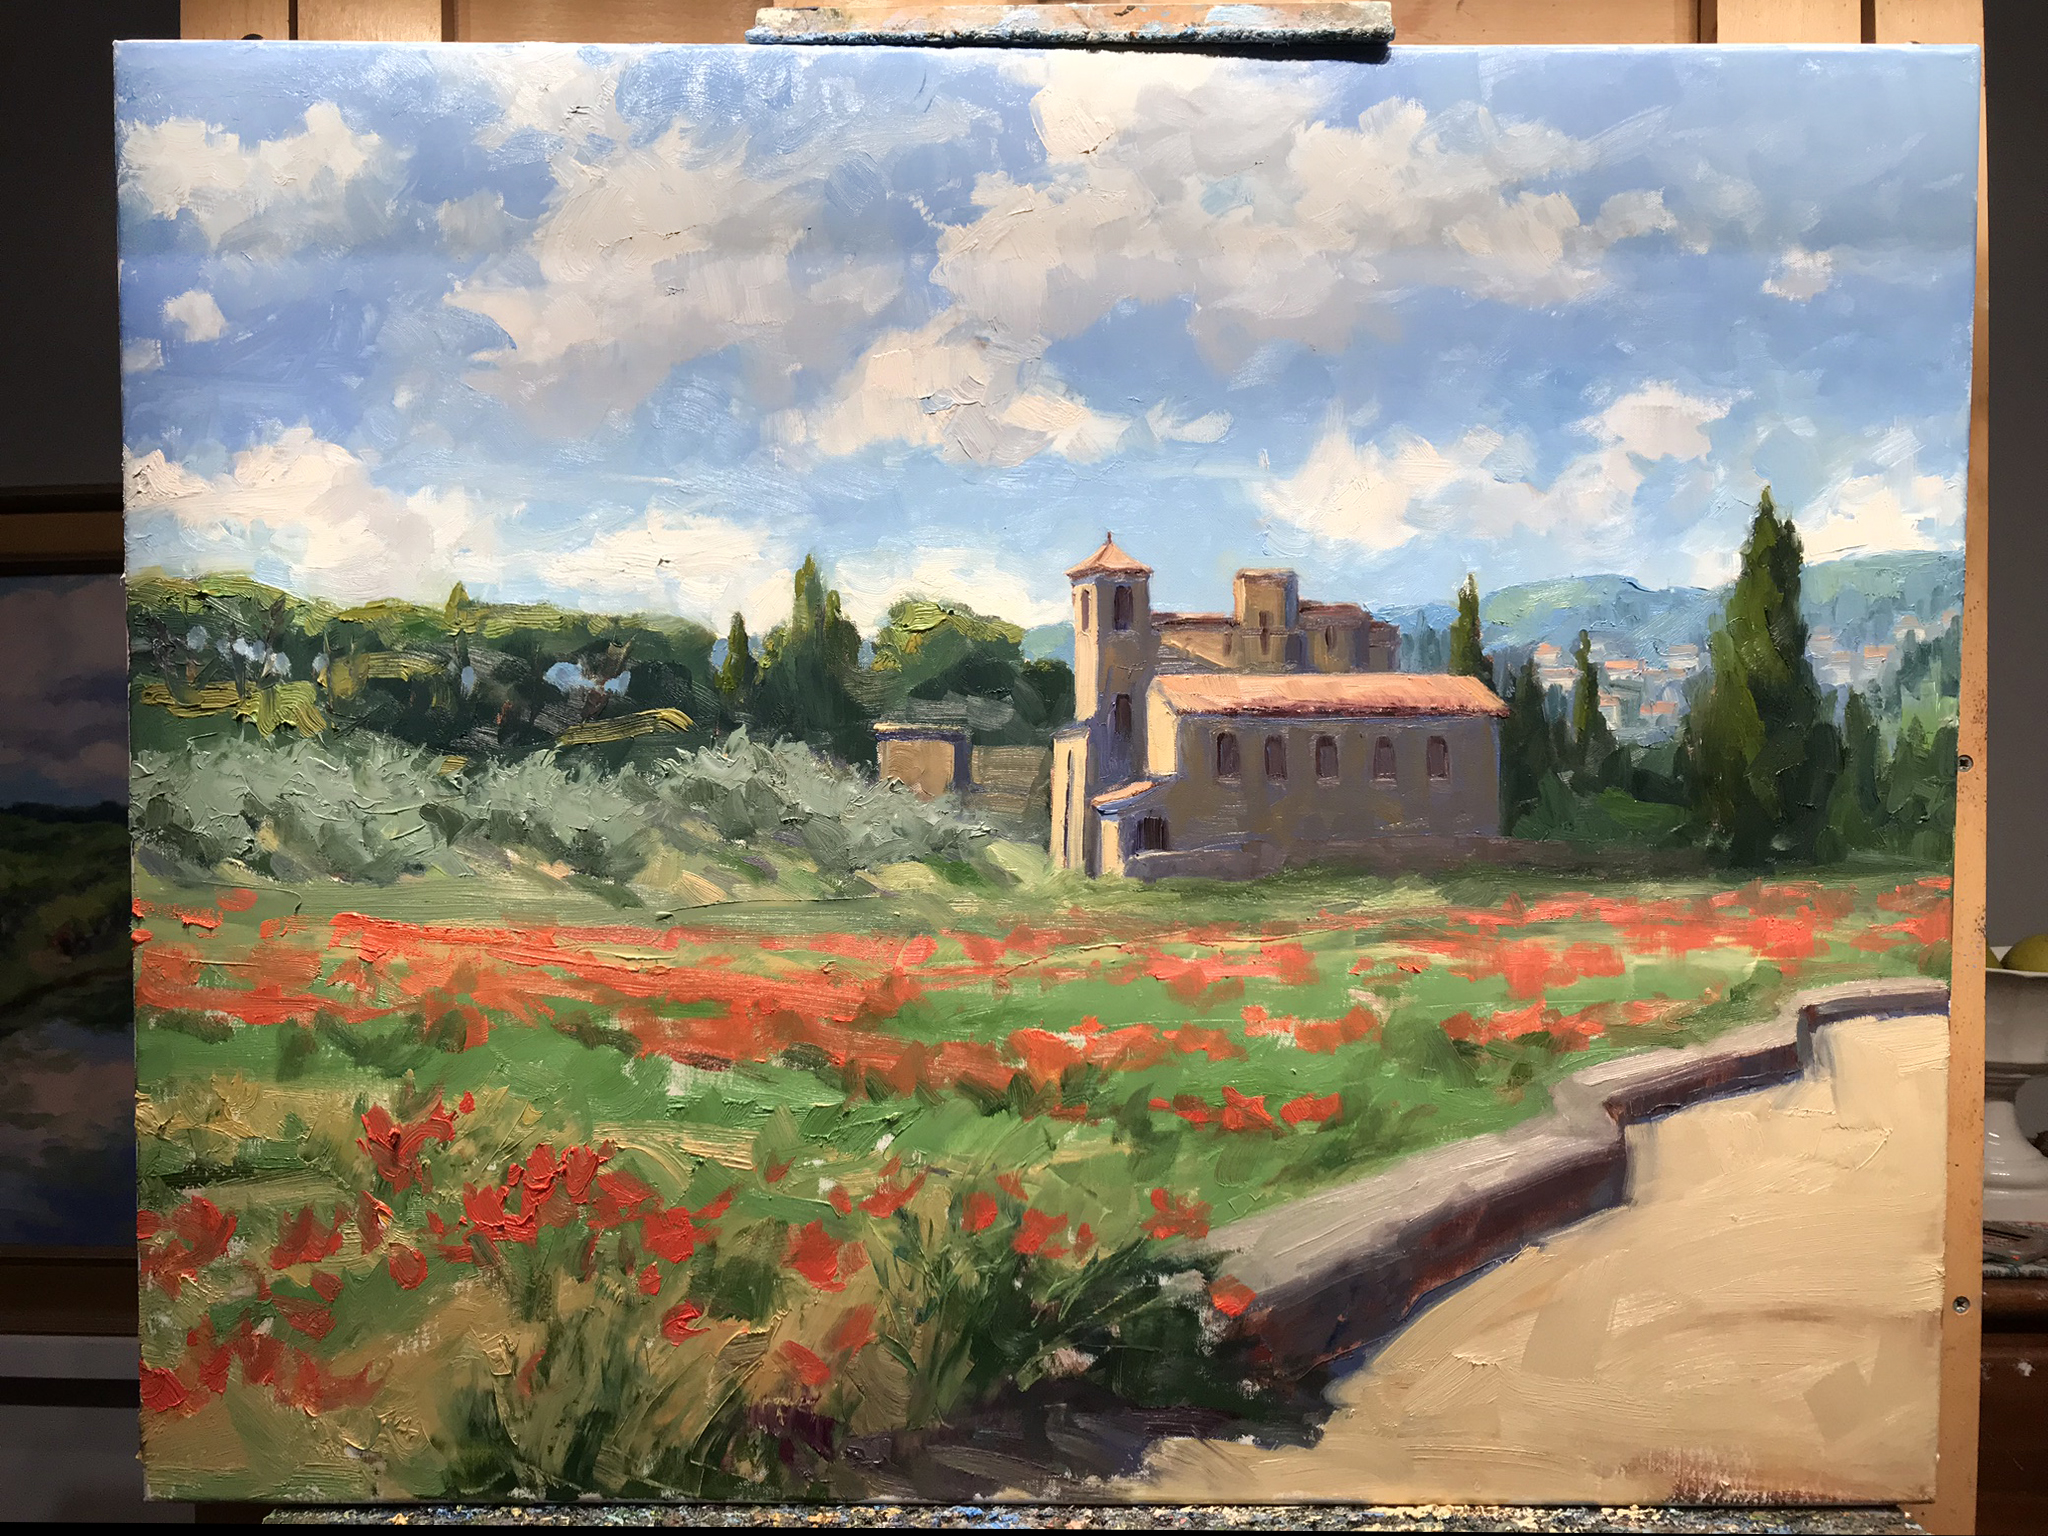
Over Christmas break as everything was pretty brown and exceedingly soggy outside, I decided to mine my many photos of sunnier times from my trips abroad. I will never forget my trip to Lourmarin, painting and eating my way through this beautiful part of Provence. I still long to go back, and am determined to do so, hopefully this time sharing it’s magic with my daughter. In the meantime I can always revisit the experience through paintings. So let’s get started, shall we?

“Le Printemps, Temple de Lourmarin”, Oil on linen, 24x30” ©Jennifer E Young

“Le Printemps, Temple de Lourmarin”, Oil on linen, 24x30” ©Jennifer E Young

Above is the completed work, photographed outside for correct color and no glare! This Protestant Church, Le Temple de Lourmarin, is simple and austere on the inside but it has a wonderful exterior and adds a sense of history and tradition as it sits like a sentry at the edge of town. Click through on the final image to read more or purchase this piece.

Edges, mark-making and tools

Happy New Year!🎉 Okay, granted I am a little late to the party, but I’ve had a busy couple of weeks moving into a new exhibit space for 2019. More on that soon, but today I wanted to share a bit about mark making, and neat little tool that I stumbled upon along the way.

I didn’t have tons of time over Christmas break to paint, but it doesn’t mean it hasn’t been on my mind. I have been thinking a lot about how I can loosen up, to create pieces that are truthful but not quite so literal. One of the things I struggle with is varying not only color but brushwork, so that there is not so much sameness everywhere. I vary brush sizes and shapes, but it still can leave me feeling a little bit like there must be something more. Sometimes I want to push a bunch of paint around and brushes alone don’t always do that.

Then one day, I purchased a Color Shaper. I actually bought this to spread gesso, because I have some pre-gessoed canvases that I bought that have been sitting around in my studio unused because are still a bit too rough and absorbent for my liking.

Before I even used it for gesso, I got curious. I had heard of other artists using these tools fairly extensively for applying paint in their work and I got to wondering whether it might be a useful tool for varying my edges and textures in my painting.

It didn’t really do what I was hoping for. These shapers come in varying degrees of firmness and the tool I ordered was an extra firm. Good for gesso spreading, but not for my painting. Still, I saw the potential so I went back online to see if I could get another one with more flexibility. But before I got that far, I stumbled upon these do-hickeys and fell in love.

colorshaper2.jpg

These guys, officially called Princeton Catalyst Wedges, are made of some kind of silicone or rubber and come in a variety of shapes . They are more flexible than my prior purchase but still firm enough to move the paint. They don’t have handles, but frankly I prefer this handle- less variety because it allows for more control.

What does it do? Well, for starters it pushes a heck of a lot of paint around, creating the ability to make bold, impasto passages or thinner, more ethereal ones.

coralsunset_detail.jpg

I can use it to make a fairly straight edge with the straight, thin side of the tool, or use it t scrape down passage to create softer edges.

coralsunset_detail2.jpg

I can use it as a blending tool, or a tool to separate out colors and make them stand out. In short, I can use it to exploit the properties of the paint in a way that is a nice variation from straight-on brushwork .

I first ordered the white tool, pictured above, left. Then then I discovered the black, which I like even better because you have greater versatility with both a long and a short edge. “Why not just use a palette knife,” you might ask? Well, I do love palette knife paintings but I always just end up switching back to brushes and reworking them because I have never been quite able to achieve that combination of softness and boldness I aim for. These little tools act like palette knives with more of a brush feel, if that makes sense.

“Coral Reflections, Late Summer”, Oil on linen, 24x36” ©Jennifer E. Young

“Coral Reflections, Late Summer”, Oil on linen, 24x36” ©Jennifer E. Young


I’m still not ditching my paint brushes; they are the work horses in my studio. But I’m having fun playing around with these new tools and exploring what I can do with them in my paintings.