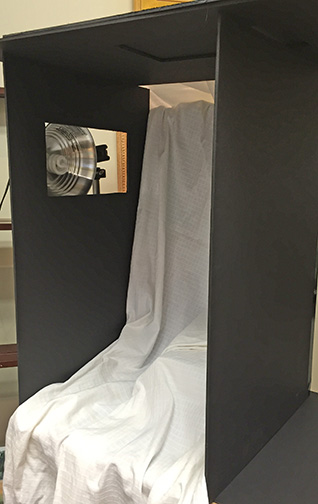
Still life shadow box
/I mentioned in my last post that it's helpful to have some contol over the lighting environment when painting the still life. A simple solution is to create a shadow box. This is not a new idea. If you google "still life shadow box", you can find lots of examples. I looked at a number of them, but given my tendency for being definitively un-handy when it comes to building things, I went for the low tech option as described by Lee A. Brown on his blog A Day Not Wasted. The only difference was that I didn't bother with the plastic corner moulding he mentions. Instead I found one of my favorite "building" supplies, some duct tape, (in black- SCORE!) when I was shopping for the foam core. Made this way, the box isn't indestructible, but it's sturdy enough since I don't really foresee needing to move it around all that much. The other difference in my box is that I made two windows for the light, one on top and one on the left side, which I can cover or uncover with the leftover scrap foam core, depending on which direction I want the light. Here's what mine looks like:

All of this is sitting on this Ikea kitchen cart on wheels, which I found on Craigslist for $10 (SCORE! again.) I'm only 5'4", so at my height, this cart brings my objects about as close to eye level as I can manage given the space I have to work with. I've gathered various boxes (gift boxes, jewelry boxes, etc. to help elevate my objects even further, and to provide some variety in the height I can achieve with various objects. Here's a slightly different angle, with my last still life setup inside:
A simple large cardboard box, open on one end, and a shop light from Home Depot, is an even lower-tech version that would also work perfectly fine.


