Change is Good (Part II)

In my last post I explained how I go about making changes to a previously completed painting that may need some minor tweaking to improve it. Today’s post deals with more drastic measures. This still life isn’t really that old, but almost since its completion I felt I wanted to do something different to the background. Both the shawl on the left and the angles on the right bothered me, as did the color combinations as they related to the foreground. All of these elements served to distract more than enhance the still life arrangement. 

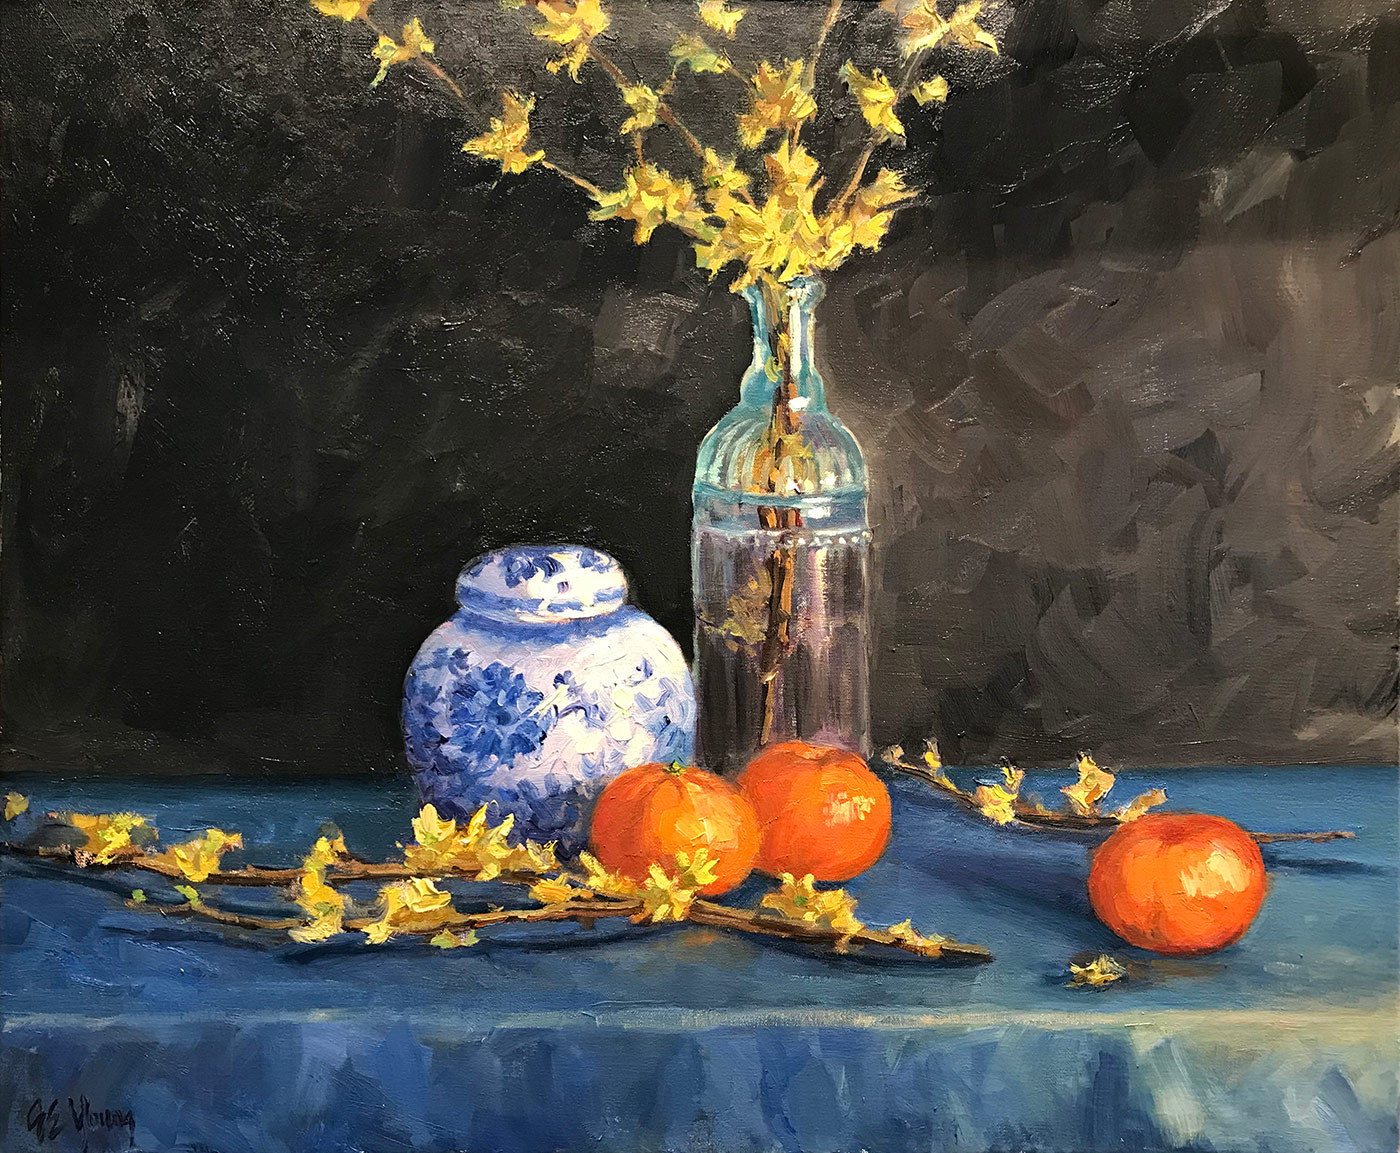
Still life, version I

Still life, version I

So, after sanding, scraping and oiling out (as described in my previous post) my first thought was to create a very simple dark background, which is a classical approach to still life painting employed by a lot of painters through the ages. I also got rid of the awkward angle in the lower right portion of the table cloth, and carried the horizon line straight across.

Still life, version II

Still life, version II

I actually liked these changes, though without the background distractions it really brought out how evenly divided the painting was by the bottle of forsythias, making for not-so-interesting negative space on either side, only accentuated by the plain dark ground. The dark color also really brought out the remaining texture underneath, even when the paint layer was built up. So, I decided to play with it a bit, knowing I could always come back to the simple dark background if I really wanted to.

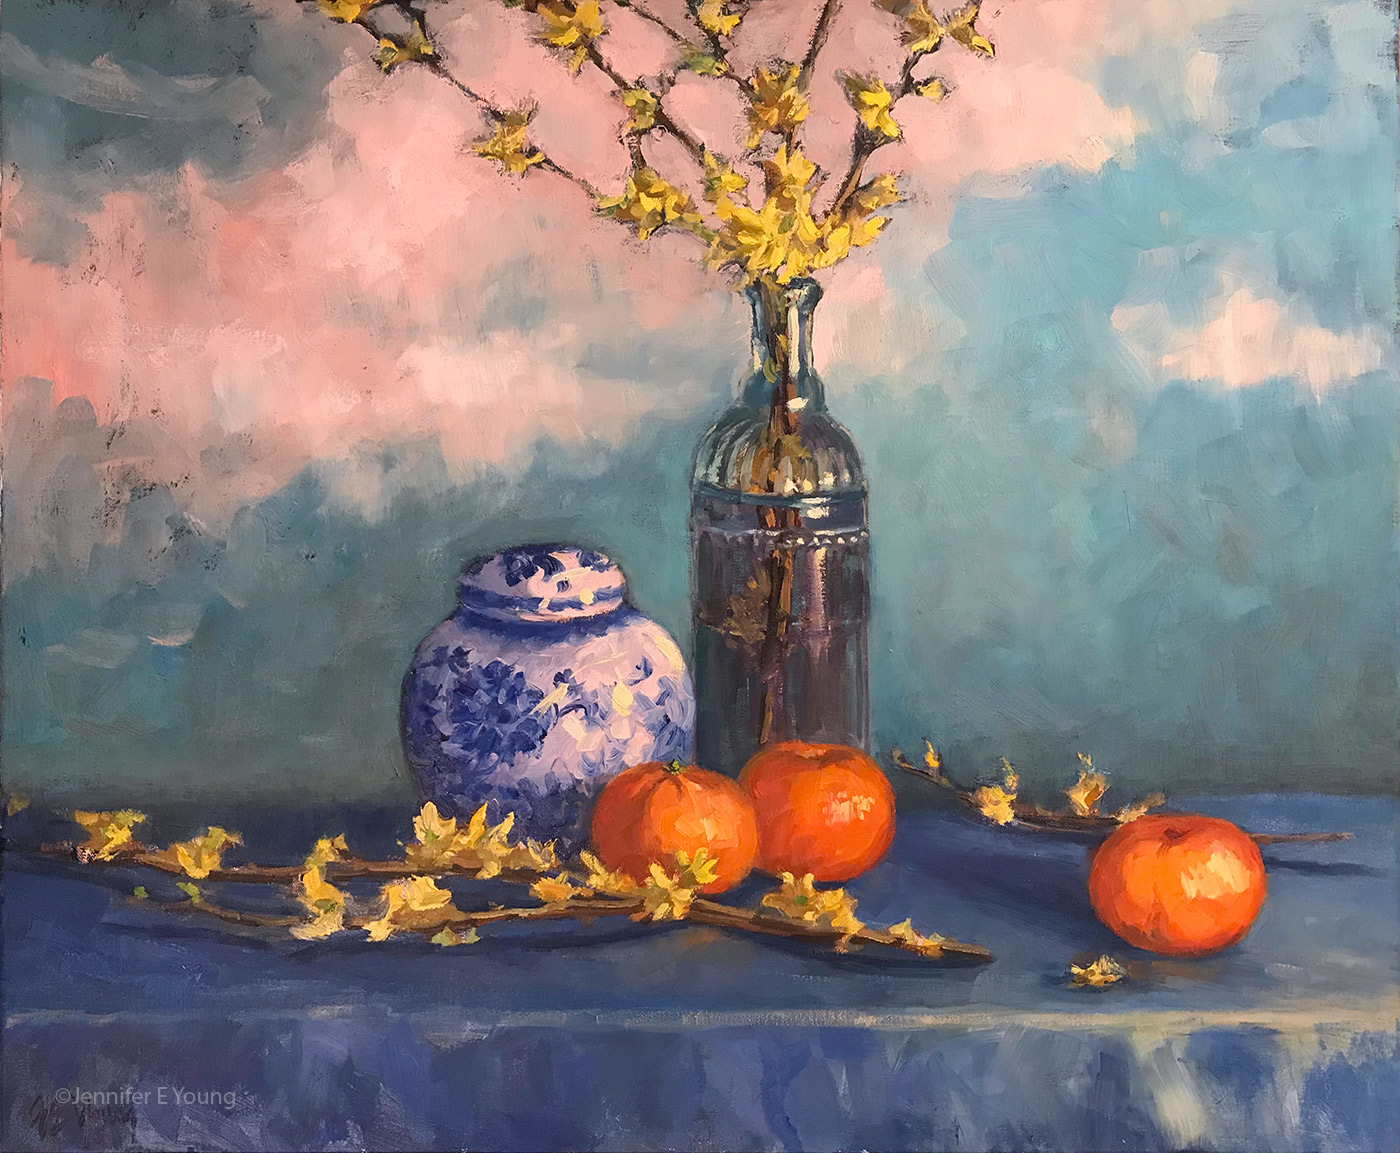
“Forsythia and Delft Blue”, Oil on linen, 20x24" ©Jennifer E Young (click the image for details)

“Forsythia and Delft Blue”, Oil on linen, 20x24" ©Jennifer E Young (click the image for details)

What I arrived upon felt to me to be both whimsical and old world at once. It almost reminds me of an antique screen or stage set of a decorative painted sky. The “clouds” served to break up the background space, and the softer, happier palette made me feel happier too. It can be a little scary to make these kind of changes but I’ve come around to the idea that  if the painting is nagging on me, the benefit of change can outweigh the risk. Have I ever “ruined” a painting doing this? Yes indeed. Occasionally my over-zealous scraping can poke a hole straight through the painting. Other times my changes may fail to satisfy me and I end up scrapping the whole thing entirely. But if I’m not satisfied with the painting as it is, it’s probably worth risking it. In any case, if I’m lucky, I have miles of canvas to go before I’m done. 

Change is Good (on revising oil paintings)

I’m not afraid of anything in this world
There’s nothing you can throw at me
That I haven’t already heard
I’m just trying to find a decent melody
A song that I can sing in my own company
— Songwriters: Adam Clayton / Dave Evans / Larry Mullen / Paul Hewson (U2)

I've heard it said that there's nothing new under the sun, and that's probably true when it comes to painting. Nevertheless,  I never stop striving to improve, both in terms of technique and in how best to express myself. I want to make work that speaks to me and hopefully speaks to others as well. No one painting can say everything and I don't expect it to. The best paintings say just enough, with sensitivity, but without overstating. 

And then there are the ones that need re-stating. :-/  Often with such paintings it is easier to just wipe down or tear up my first effort and see if I can try again on a fresh canvas. Sometimes though,  it seems worth the effort to attempt a revision first before scrapping the whole darn thing. If the painting is fresh and new, reworking is a fairly easy and straightforward task, as there isn't an under-layer of built up paint to compete with.

But it may not occur to me right away exactly what change is needed, and it's only after sitting with it a while that I want to go back into it again. In these cases, a little bit of elbow grease is required, both to ensure proper adhesion of the new paint layers and to knock down any unwanted texture. 

My painting, "Rugosa Coastline" is a studio piece that was based on a smaller plein air piece I did when I was up in Maine. After a few months of thinking about it I decided that it lacked something that the plein air piece captured. I felt the studio piece was labored, overall too busy, and the colors, especially in the foreground greenery,  too intense for the time of day. So I set to work to see if I could make a few changes, to maybe loosen it up, and tone down the colors to ones more faithful to the time of day I was trying to capture.

First pass of my 24x30" studio painting based on the smaller plein air piece below.

First pass of my 24x30" studio painting based on the smaller plein air piece below.

"Day's End, Lane's Island", Oil on linen, 11x14" ©Jennifer E Young

"Day's End, Lane's Island", Oil on linen, 11x14" ©Jennifer E Young

My first order of business was to knock back some of the texture. Not all texture in the under layer is bad, but if there is  a lot of texture that shows through as a "ghost" image I will sand it down a bit. If it's really built up I may find I need scrape it away razor blade, very carefully, (and pray I don't poke a hole in the canvas). 

Next I will "oil out" to give the new paint layer better adhesion to the partially dried layer underneath. To oil out, solvents or medium (or a combination) is brushed in a thin layer on the surface of the portion of canvas you want to rework. Most often I just use a little Gamsol for this purpose. 

"Rugosa Coastline" (SOLD) Oil on linen, 24x30" ©Jennifer E Young

"Rugosa Coastline" (SOLD) Oil on linen, 24x30" ©Jennifer E Young

The resulting painting was still a bit different than the little plein air piece, but it felt truer to the time and place and to the feelings that I had when creating the painting on the spot. I felt significantly happier with the revised version of this painting, and wouldn't you know, someone else did too? It sold not long after the revision. 

Tune in to part two in my next post, where I'll share another revision I undertook, which ended up with more extensive and fairly dramatic changes. 

Plein air odds and ends

In this post I thought I'd share a little about some of the tools I carry with me in my plein air pack. Some are specifically designed for the plein air artist, and some I have co-opted for my own nefarious purposes. ;-) This first photo shows a picture of my current setup: 

55C537F3-E39E-415D-BB8B-0EB07B466242.JPG

My paint box is one I have mentioned before, but I love it so much I will say it again! It's the Coulter Easel. It is so quick to set up and simple to use. It has lots of work space for color mixing as well. Mine is the Compact model. Coulter's site offers other sizes as well, but I felt that this model was the most versatile for me as while it is lightweight, it doesn't compromise valuable workspace. As for the other items in this photo, I will list them in a clockwise manner. 

  • A mini sun shield that closes up flat into a small circle. I use this to cast a shade on my palette so that I don't get the glare of sunlight on it. I do have an umbrella, but many times depending on how I position myself, this little shade is all I need. When I do find the need for an umbrella, the model I use is Bestbrella. It works great for me.  
  • An envelope-style brush holder.  Called a "brush wallet", this style brush holder comes with a loop at the top, which I loop onto my tripod handle. I like this brush holder because I can tuck this in behind my palette and have my brushes handy without taking up space on my paint box. (*Note- I couldn't find a source for my brush holder. I bought it a number of years ago and I am thinking I bought it from
  • A couple of zip-up pencil bags to carry my paints. In one I carry my large tube of white, my mediums (more about that in a minute) my paint scraper, and palette knife. In another I carry all of my other oil colors.  
  • A bungee cord to hold my paper towels. The hooks on the bungee loop right over the lip of the paint box.  
  • A mini trash can. This is something I picked up in the automotive section of a big box store. Like the sun shield it also twists down into a little circle. It stays closed with an elastic band that is attached to the plastic rim. A plastic shopping bag will work in a pinch, but I prefer this style holder over the plastic bag because it doesn't blow around in the wind and remains open as I'm working. This little model came with a plastic loop on the top that I used to thread the bungee cord through, eliminating the need for clips or clamps.
  • Protective gloves for my hands. As you can see, by my brush handles, I'm not the neatest painter around, so gloves are a must for me. I became allergic to both latex and nitrile gloves, so the gloves I use are actually food grade gloves by Platex. They are the only semi-sturdy gloves that I don't react to. They actually hold up great. One benefit to these gloves is that I can get them in the grocery store when I'm grocery shopping, so I don't have to make a special trip to the hardware store when I run out. 
  • A small cat food can. I use this little can to hold a small amount of  Gamsol that I use to thin my paint in the very beginning stages of painting. I just pour in a little amount at a time, so when I'm done painting for the day I can just wipe out the can and pack it away.
  • A small eyedropper for holding the Gamsol. I'm using an eye dropper because it's small and it's what I had on hand, but any small solvent-safe container will do. Gone are my days of carrying around those heavy metal turp containers.  Check the next photo to find out why. 


0373A855-E584-47C9-9E73-CB049F8AC3D2.JPG
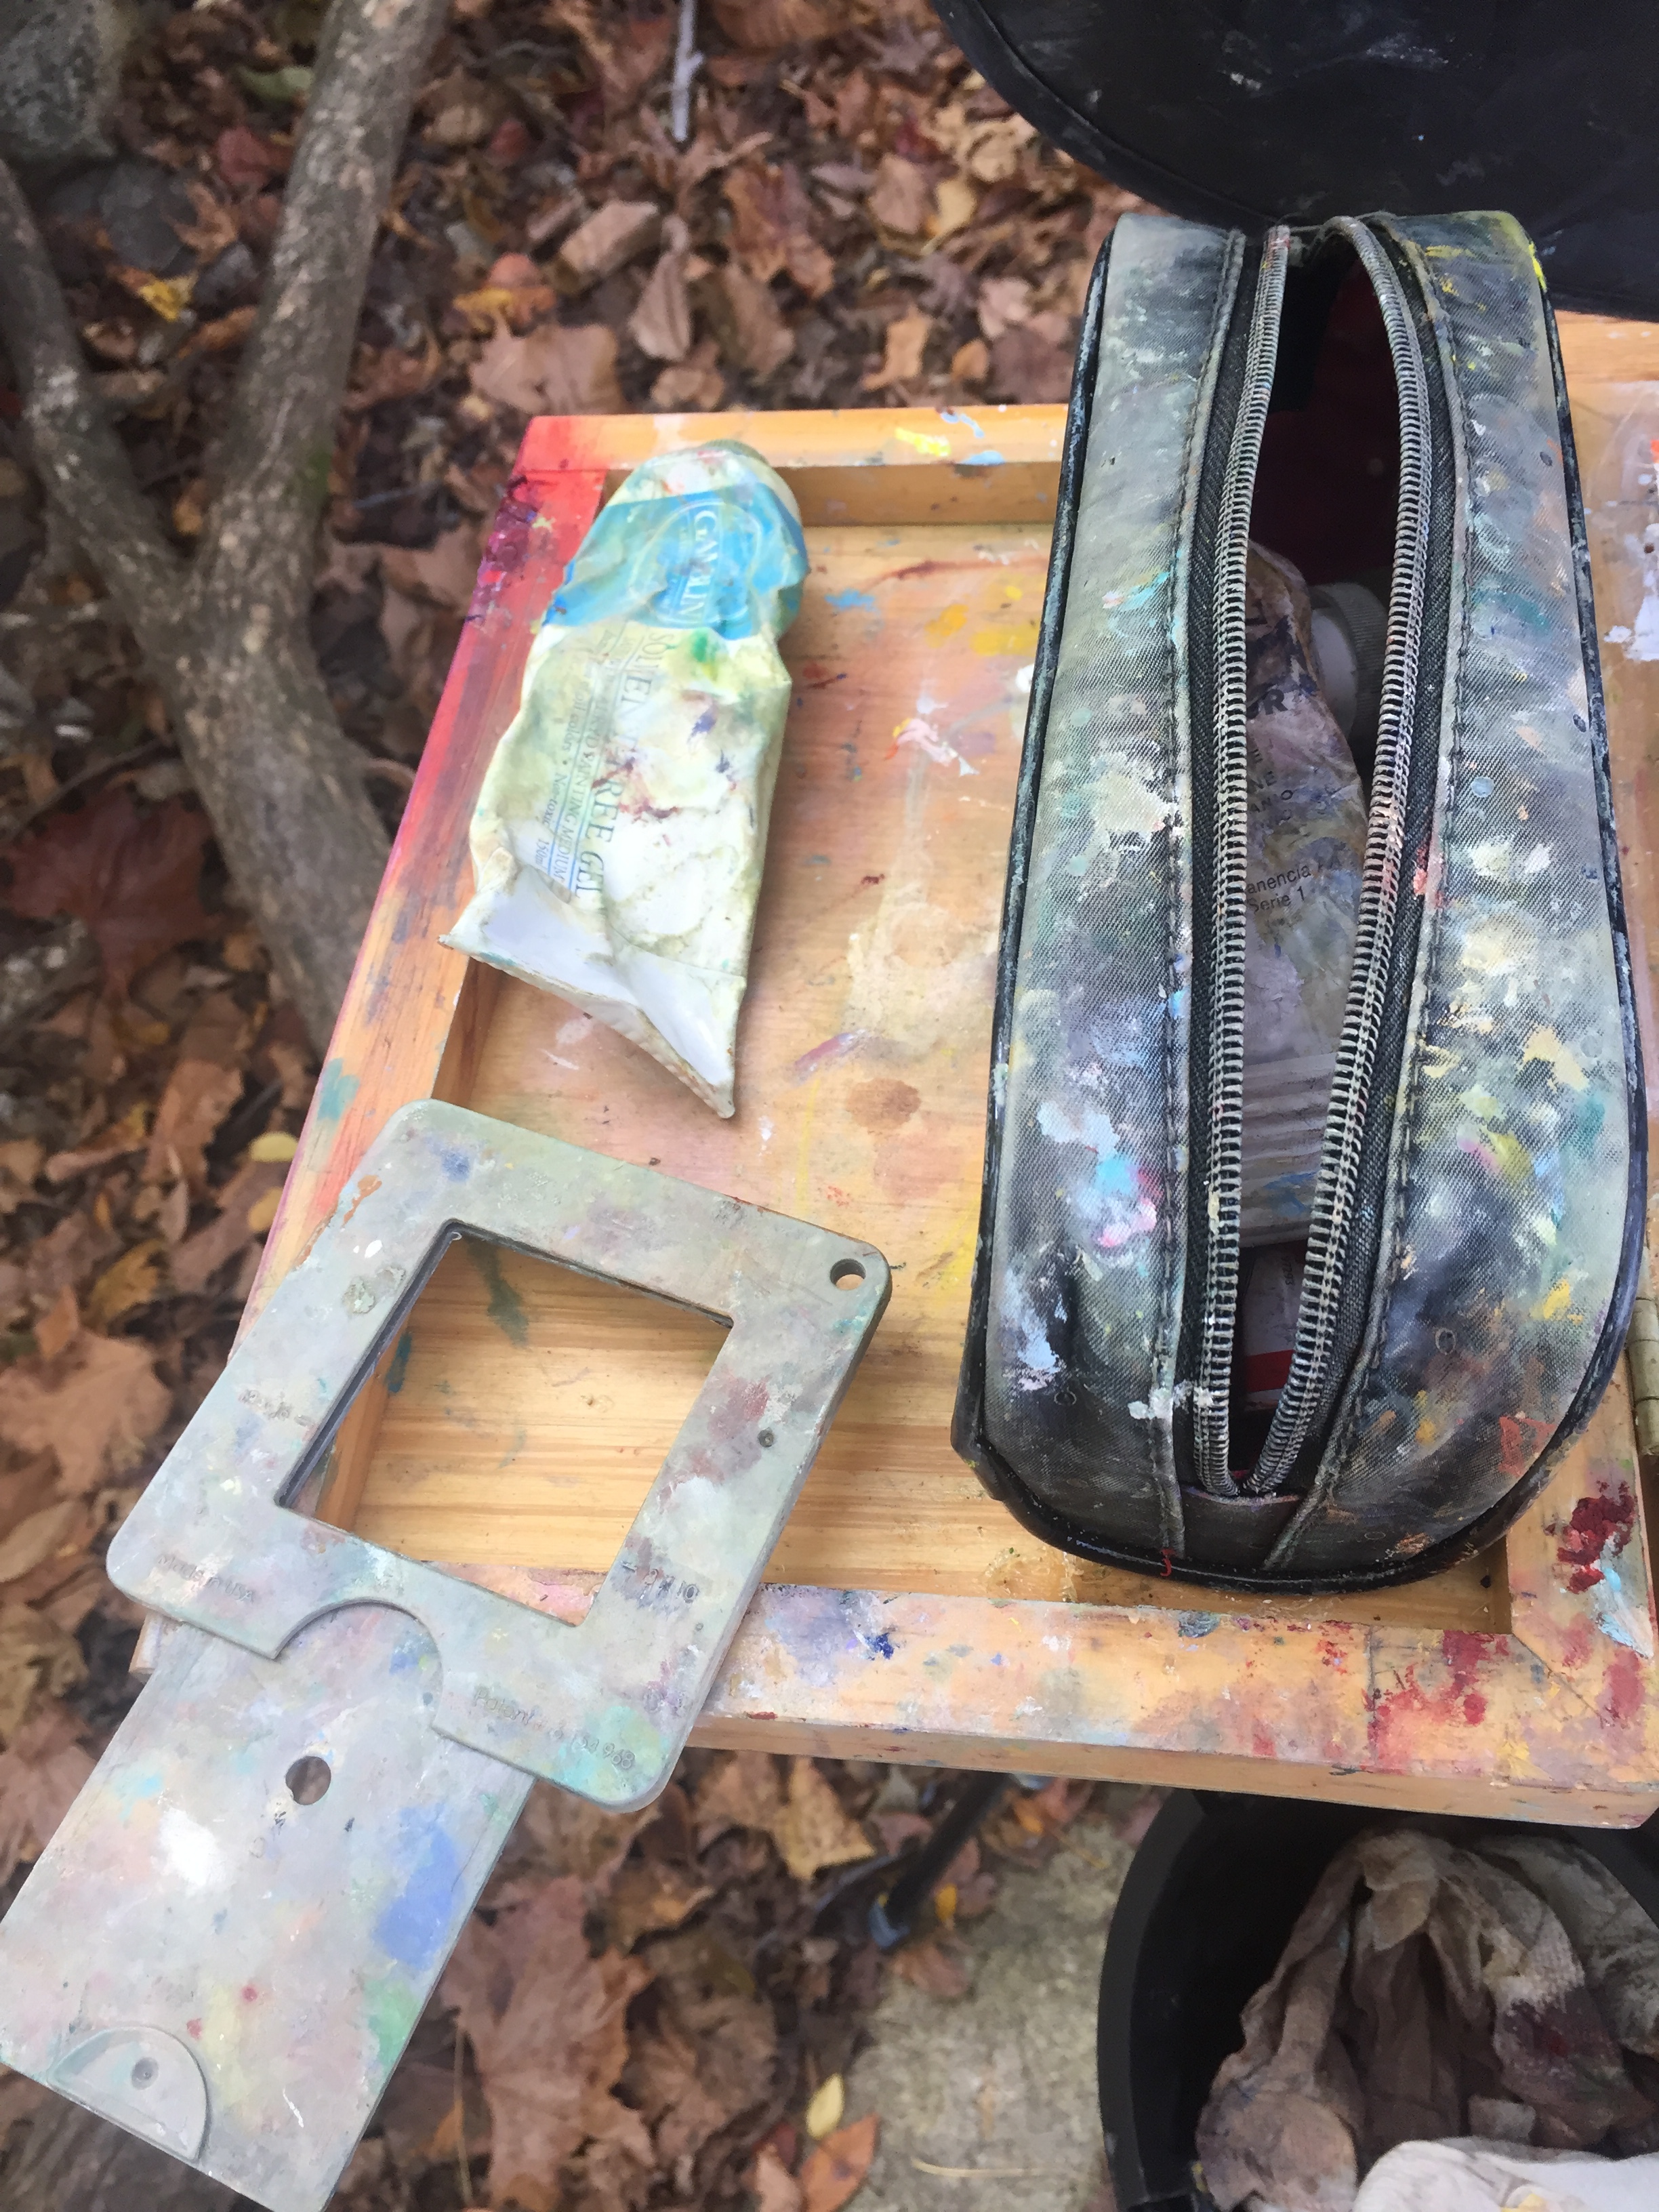
  • Gamblin Solvent-free Gel. Okay, I am not painting completely solvent-free, as I prefer a thinned-down , lean application in the beginning for my preliminary drawing. I use Gamblin's Solvent-free Fluid in the studio, but I prefer the gel in my plein air pack as the fewer liquids I have to worry about spilling the better. You can even use this stuff to clean off your brushes between colors and just wash them all up with soap and water back home in the studio. 
  • A view finder. There are various offerings on the market, but I prefer this simple model. The little lever moves up and down to change the proportions. Several popular sizes are marked on the view finder (9x12, 8x10, 12x16, Etc.) The little holes in the view finder also serve as color isolators as well. 

This is not a comprehensive list but it covers most things. There may be a few other odds and ends to discuss, and if I come across them I will definitely share them here on the blog. 

James River plein air

Oh happy day! Oh cold morning; but nevertheless, happy day. This week I finally managed to get back outside, to visit one of my favorite painting muses, the James River. The James River Park system in Richmond, VA, continues to fascinate me and remains one of my all-time favorite plein air painting sites.

*SOLD* Autumn Morning on the James River", Oil on canvas, 6x8" ©Jennifer E Young

*SOLD* Autumn Morning on the James River", Oil on canvas, 6x8" ©Jennifer E Young

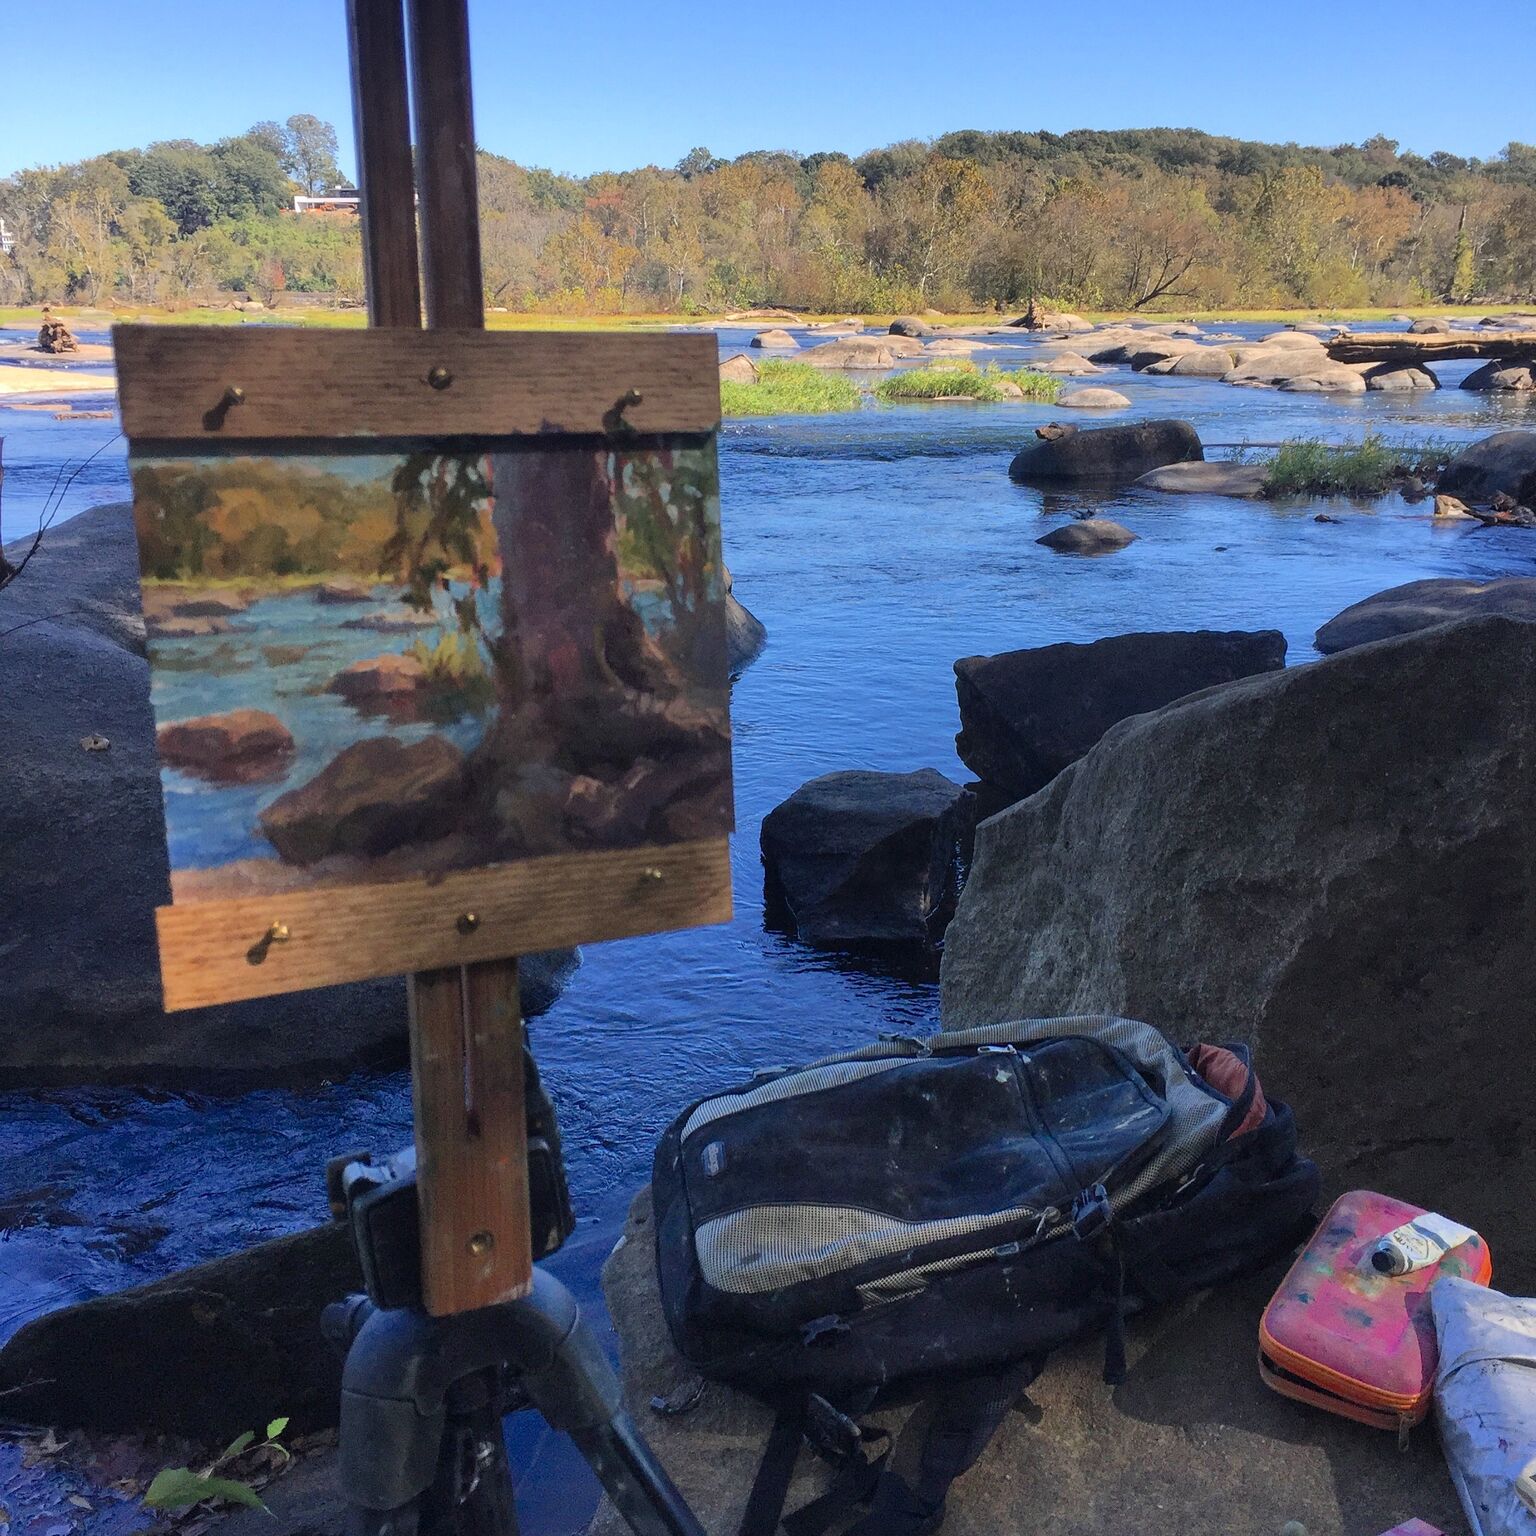
I painted this at Pony Pasture, where I stood wedged between some boulders.

jamesriverpleinair_jenniferyoung

Pony Pasture is on the south side of the river, in Richmond VA. I've always wondered where this part of the park got its name, but only today did I think to look it up. According to Richmond.com, "The name came from the 1960s when the area was suburban and people who were into housing their horses near the river," said Ralph White, who is the (now retired)  manager of the James River Park.

While there are no ponies today (though what a cool sight that would be) there are plenty of other creatures to observe, including Canadian geese and herons, as well as dogs and their owners, fishermen, kayakers and canoers. Oh, and you might occasionally see the odd painter too. ;-)

Venetian market demo, continued

Today before I continue with my painting demo, I thought I would mention the colors I'm using on my palette. For many years I stuck with a fairly limited palette of about 5 or six colors (cad. yellow light, cadmium red, alizarin, ultramarine blue, pthalo green and white.) This was great for me as it really pushed me to learn how to mix color and not become reliant on pre-mixed colors from the tube. It also really helps lighten the load when I am packing my gear to take my studio outside and paint en plein air.

But these days in the studio, my time is more limited. I have a finite amount of hours each week to paint, blog, frame, ship, not to mention cook, eat, sleep, and care for my family. So I have allowed myself the luxury of an expanded palette to speed things along in certain areas. For instance, while I know how to mix secondary colors and some decent earth tones with a limited palette, things can move a bit faster if I have some premixed secondary colors (a.k.a. "convenience colors")  in my toolkit. So, for instance, red+yellow= orange., but cadmium orange is still a nice color to have both for it's purity and intensity and its convenience. In any case, whether I am using primaries or secondaries or pre-mixed earth colors, there is still plenty of color-mixing along the way, and  I don't ever use any color straight from the tube on my canvas.

Aside from the convenience, I am just enjoying playing with new colors. I've had less time to get out to doplein air painting, and I have missed it. So adding something new to experiment with in the studio keeps things fresh for me. On the palette I'm using right now I've introduced a few earth colors, plus some colors from Gamblin's radiant line. Aside from the colors listed with the asterisk *, I may not keep all of these colors out on my palette every time. But they have made an appearance in the studio often enough over the last few months that they are worth mentioning. All of these colors are Gamblin unless otherwise noted:

  • *Titanium white (Gamblin or Winsor Newton)
  • *Cadmium Yellow Light
  • Cadmium Yellow Deep
  • Indian Yellow (Winsor Newton)
  • *Cadmium Orange Deep
  • *Napthol Red
  • Radiant Red
  • *Quinacridone Violet
  • *Ultramarine Blue
  • Severes Blue-sometimes (Rembrandt)
  • *Radiant Turquoise
  • *Pthalo Green
  • Permanent Green Light
  • *Payne's Gray
  • *Brown Pink
  • Gold Ochre (Rembrandt)

 Now that I've gotten that bit of housekeeping out of the way, let's get back to painting! I spent my last post addressing the "shadow family" in this scene. In this picture you can see that much of the busy market scene is now at least suggested. But light is needed to delineate the forms and bring the scene alive.

venetianmarket_wip4_jenniferyoung

These images are a bit dark as I did not take the time to color correct the in-progress shots. But hopefully you can see that my approach has been to just focus on the general shapes of things without getting too bogged down in details. There are basically three large shapes of light spilling over this painting: the sky, the pavers, and the white awning, with lesser highlights on the figures.

Here is the final stage. I have kept things fairly loose because I wanted to keep the focus on the foreground figure, while still maintaining unity throughout the painting. Notice the difference in the color of the final piece below, taken under better lighting conditions to show the true nature of the colors in the painting.

"Il Mercato Veneziano", Oil on linen, 14x11" ©Jennifer E Young

"Il Mercato Veneziano", Oil on linen, 14x11" ©Jennifer E Young

Thanks for following along on my little painting journey to Venice! This piece is heading to City Art Gallery in Greenville, NC for their 30th Anniversary Celebration September 22nd. 30 years! Wow! Come join us for the party and see this painting (and yours truly)  in person! :-)